

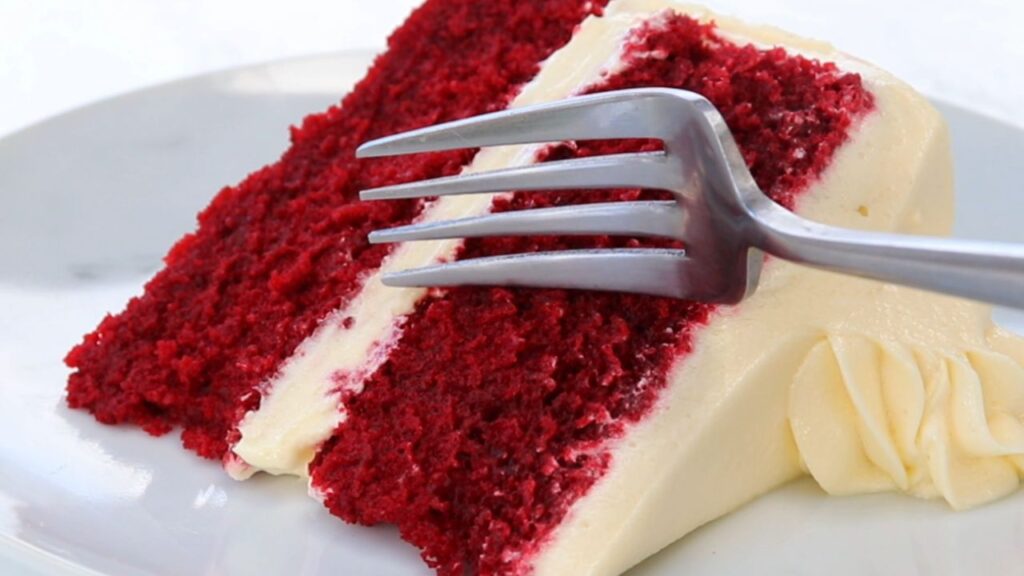
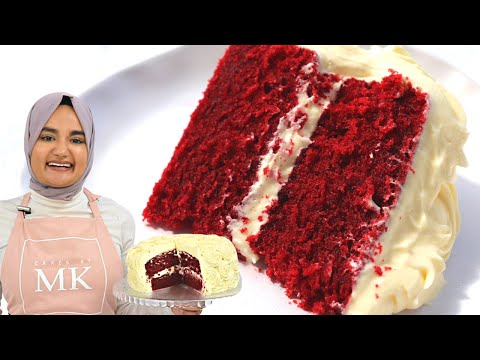
When I first shared this red velvet cake recipe a few years ago, I remember being SO excited because it was genuinely one of the softest cakes I had ever made. Now, with over 300 5-star reviews, I’m so glad you are all loving it as much as I do! It’s incredibly moist with that classic velvety texture, full of flavor, and topped with the most delicious, slightly tangy cream cheese buttercream.

What Exactly Is a Red Velvet Cake?!
So, what exactly makes a red velvet cake a red velvet cake?! Think of it as a delicious middle ground between a vanilla and chocolate cake, with a subtle chocolate flavor, a hint of tanginess, and that signature soft, velvety texture.
The tangy flavor comes from ingredients like buttermilk and vinegar, which are classic in red velvet cake recipes. These days, red velvet cake is usually made with red food coloring for that gorgeous deep red color and is most commonly paired with cream cheese frosting or ermine frosting.
For this recipe, I’m going with my favorite pairing: a rich, creamy, and slightly tangy cream cheese buttercream! If you prefer ermine frosting, you can also check out my traditional red velvet cake recipe, which uses the same soft red velvet cake base but is topped with classic ermine frosting instead. Some people prefer it, as it’s less sweet and a bit more subtle in flavor. I also have an eggless red velvet cake recipe that I promise is just as soft and moist!
Why You’ll Love This Recipe
SO soft and velvety: This cake has the most incredibly soft, tender texture that practically melts in your mouth.
Perfectly balanced flavor: It has just the right amount of chocolate flavor, sweetness, and tanginess without any one flavor being overpowering.
Cream cheese buttercream: The slightly tangy, creamy frosting pairs SO well with the soft red velvet cake.
Easy to make: You don’t need any fancy equipment or complicated techniques to make this cake.
A total crowd-pleaser: With over 300 5-star reviews, I think it’s safe to say this one is a reader favorite! 💗
A Note on the Updated Measurements
You may notice that some of the cup and tablespoon measurements in this recipe have changed slightly from the original recipe. When I first developed this recipe, I wanted to keep the measurements as accurate as possible, so I would measure an ingredient using a cup or tablespoon, weigh that amount, and use the resulting gram weight as my exact measurement. I did this because I often found that ingredient conversions don’t always translate perfectly, and weighing the amount I naturally measured could sometimes give a more accurate result.
Over time, though, I realized this could be confusing, so I’ve moved toward using standard US cup and spoon measurements. I have not changed any of the gram measurements, so the recipe itself has not changed.
I still highly recommend using the gram measurements whenever possible. For example, 1 cup of all-purpose flour is generally considered 120 g, but depending on how you measure that cup, you can easily end up with a different weight. Using a scale gives you a much more consistent and accurate measurement every time.
The following measurements have been updated from the original recipe:
– Cornstarch: 3 tbsp (18 g) → 2½ tbsp (18 g)
– Cocoa powder: 3 tbsp (14 g) → 2½ tbsp (14 g)
– Vegetable oil: ¾ cup (141 g) → ⅔ cup (141 g)
– Buttermilk: ¾ cup (158 g) → ⅔ cup (158 g)
Again, the gram measurements have remained exactly the same, so these updates do not change the recipe or the final cake.
How to Make Red Velvet Cake
You can find the full list of ingredients for this red velvet cake recipe in the recipe card at the end of the blog post. For easy navigation, just hit the “jump to recipe” button at the top of the page. Here’s a quick visual breakdown of how to make it, and you’ll also find the recipe video in the recipe card below.
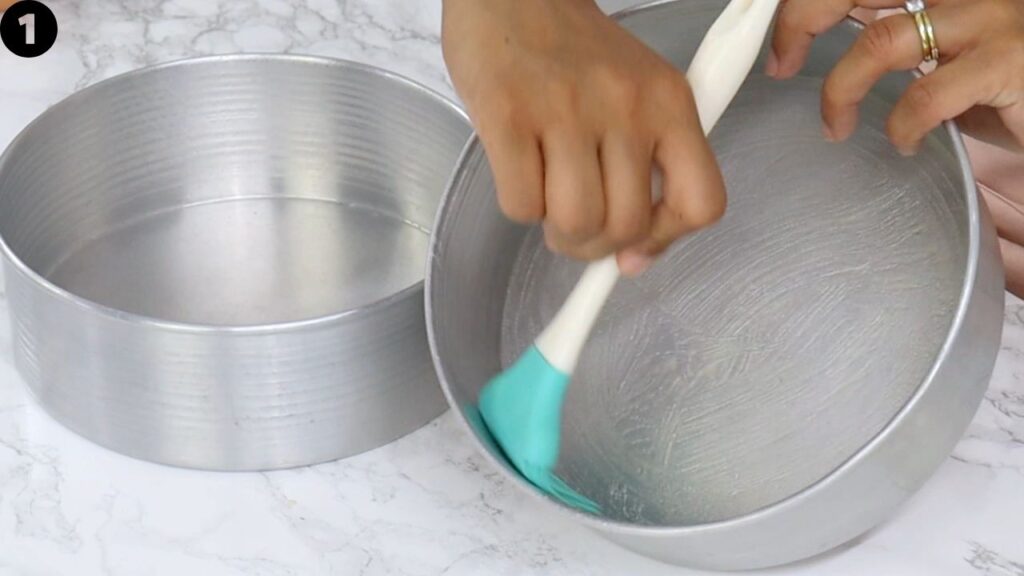
Preheat oven to 350°F (180°C) conventional and grease and/or line two 8×3-inch cake pans (I use my homemade cake release).
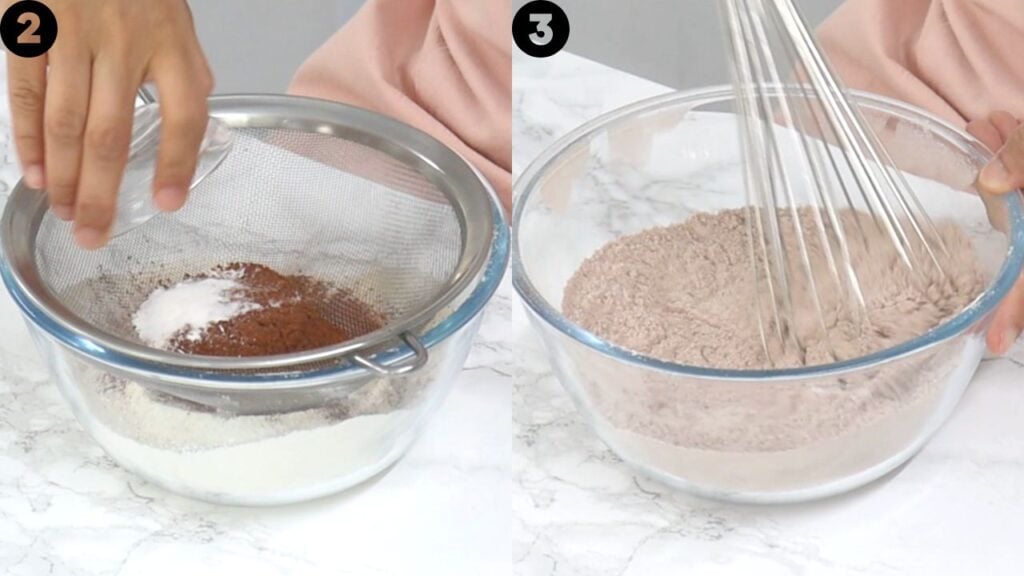
In a medium bowl, sift together flour, cornstarch, unsweetened cocoa powder, baking soda, baking powder and salt. Using a whisk, mix until well combined. Set aside for now.
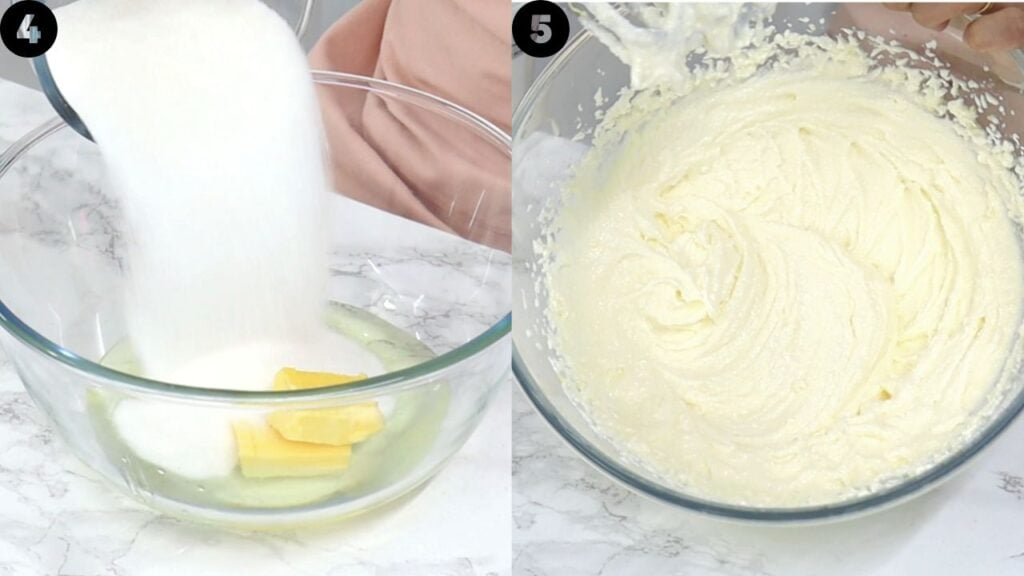
In a large bowl, add the butter, vegetable oil and sugar. Using an electric mixer, cream together for 2-3 minutes until light and creamy.
Add the eggs one at a time, mixing well between each addition.
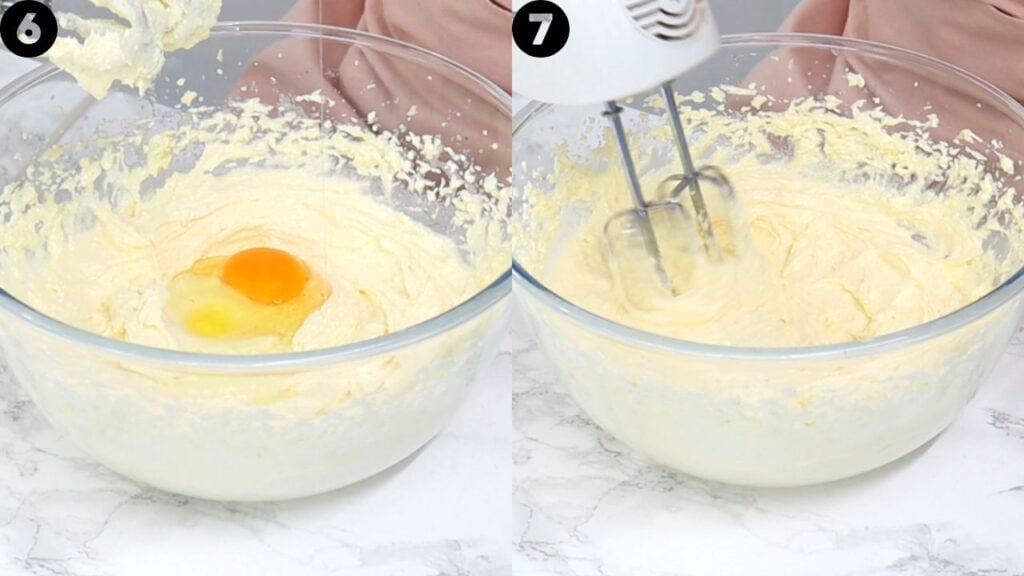
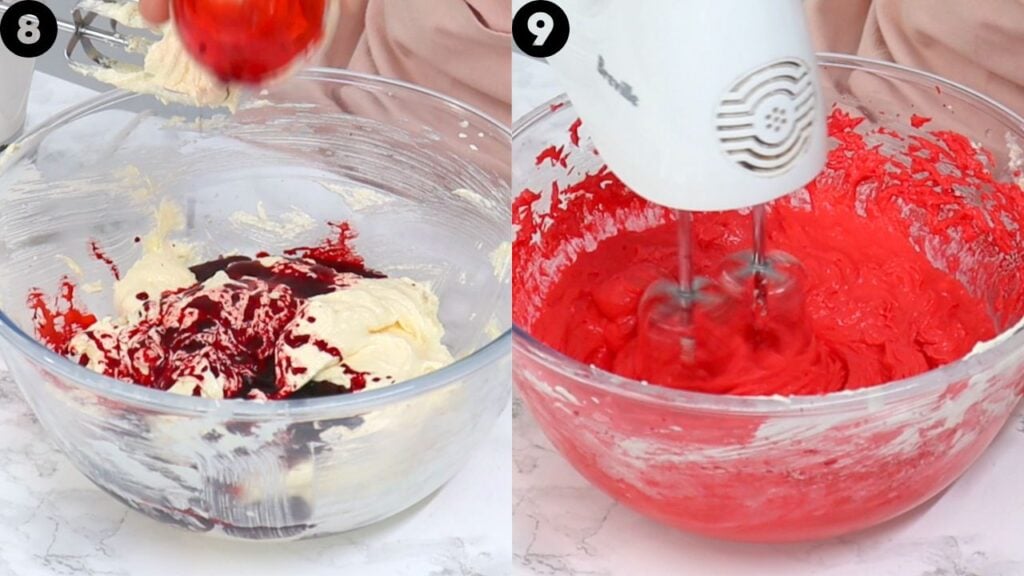
Add the vanilla, white vinegar and red liquid food coloring, and mix until well combined. Set the mixer aside as the remainder of the batter will be finished by hand.
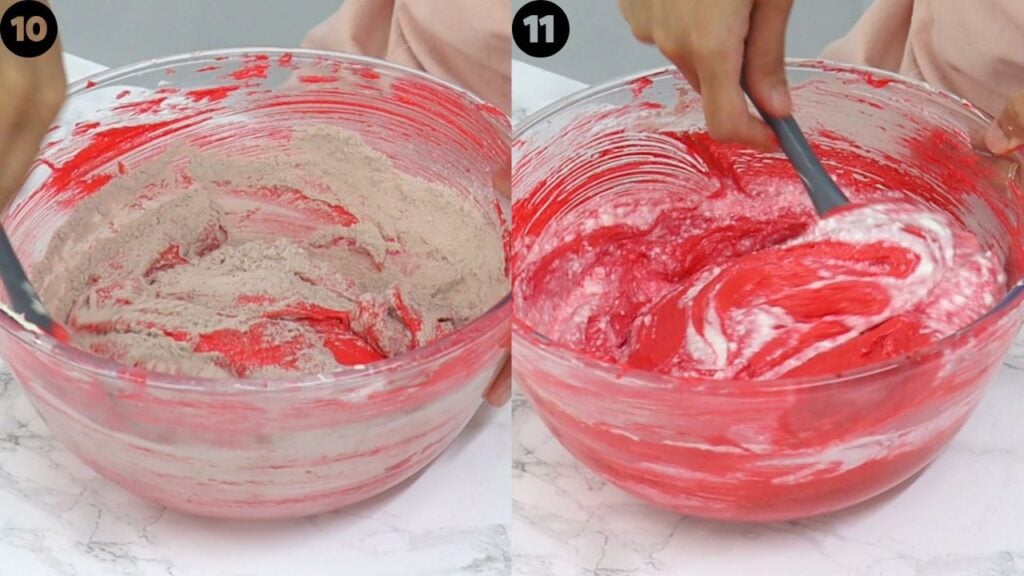
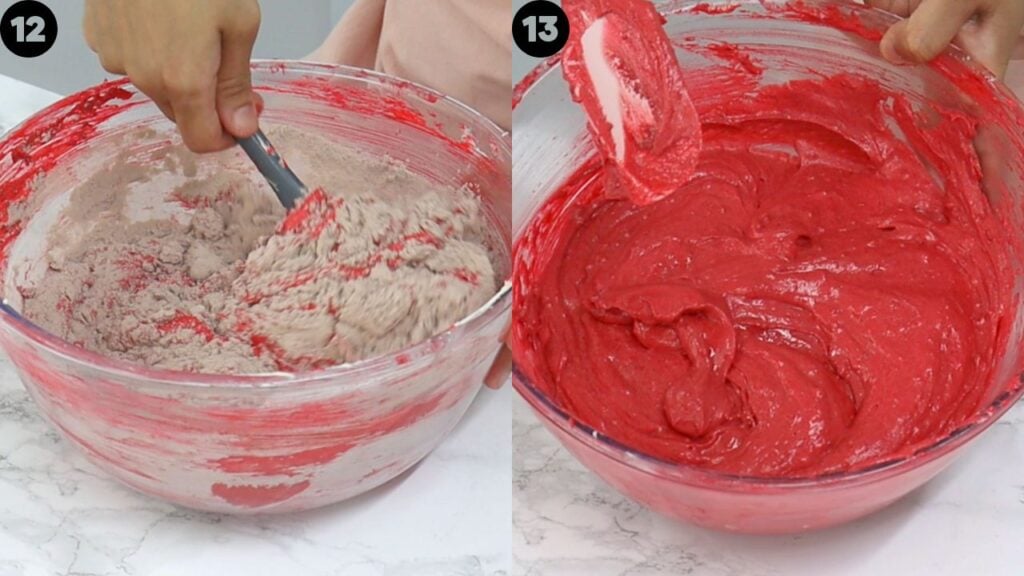
Add half of the dry ingredients to the wet ingredients and gently fold together with a spatula until just combined. Add all of the buttermilk and gently fold until just combined. Lastly, add the remaining dry ingredients and gently fold until just combined. Do not overmix.
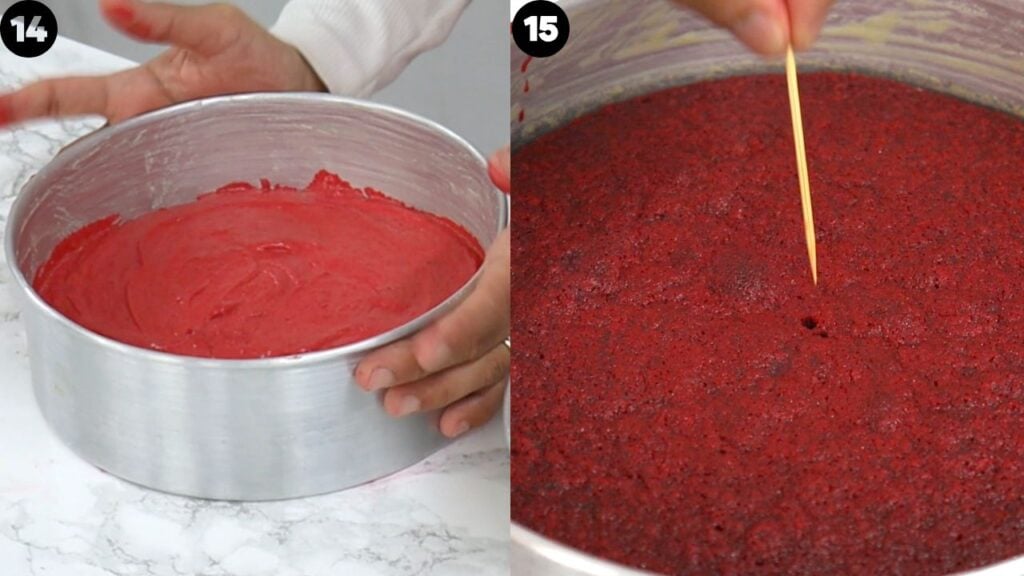
Divide the batter evenly between the prepared cake pans and bake for 30 minutes, or until a toothpick inserted into the center comes out clean or with a few moist crumbs. Be careful not to open the oven door too early, as this can cause the cake layers to sink. Also, avoid overbaking the cake layers, as this can cause them to dry out.
Allow the cakes to cool in the cake pans for 15-20 minutes before carefully turning them out onto a wire rack to completely cool. Once cooled, frost with my cream cheese buttercream frosting.
How to Decorate Your Cake
There’s no particular way to decorate a red velvet cake, but here’s how I decorated mine using my cream cheese frosting recipe. 🙂
Usually, I would trim (or torte) the tops of the cakes with a serrated knife to make them flat, but these red velvet layers bake up really nice and flat, so no trimming was required. I went ahead and added a generous amount of frosting to my first cake layer and smoothed it out with my offset spatula before placing the next cake layer on top.
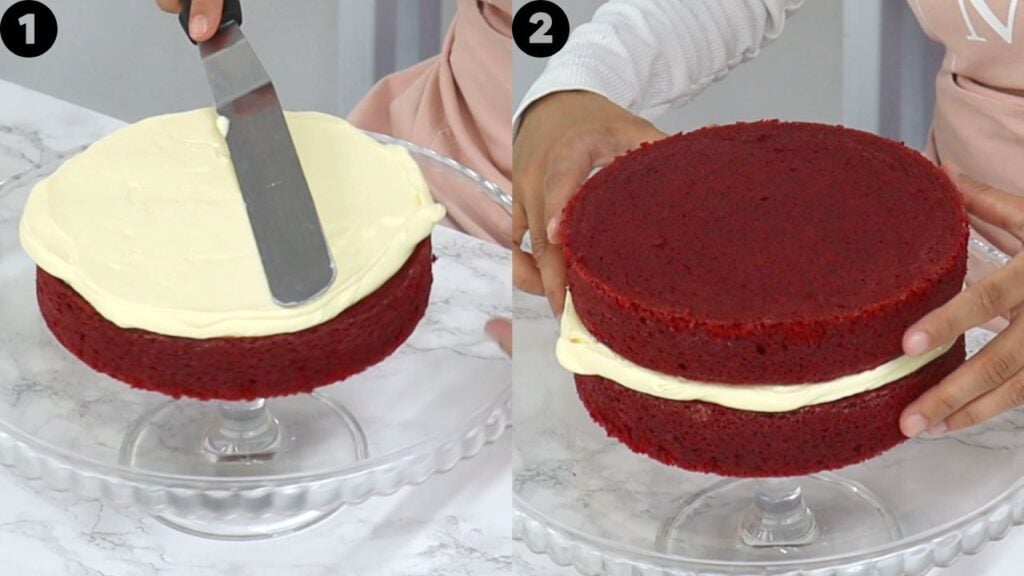
Next, I added some frosting to the top cake layer and spread it out with my offset spatula. I then used the excess frosting on the sides to cover the entire cake. I only did a thin layer of frosting and didn’t worry about doing a crumb coat because I was piping rosettes all around the cake. If you also want to pipe rosettes, you’ll need to make 1.5x my cream cheese frosting recipe to ensure you have enough frosting.
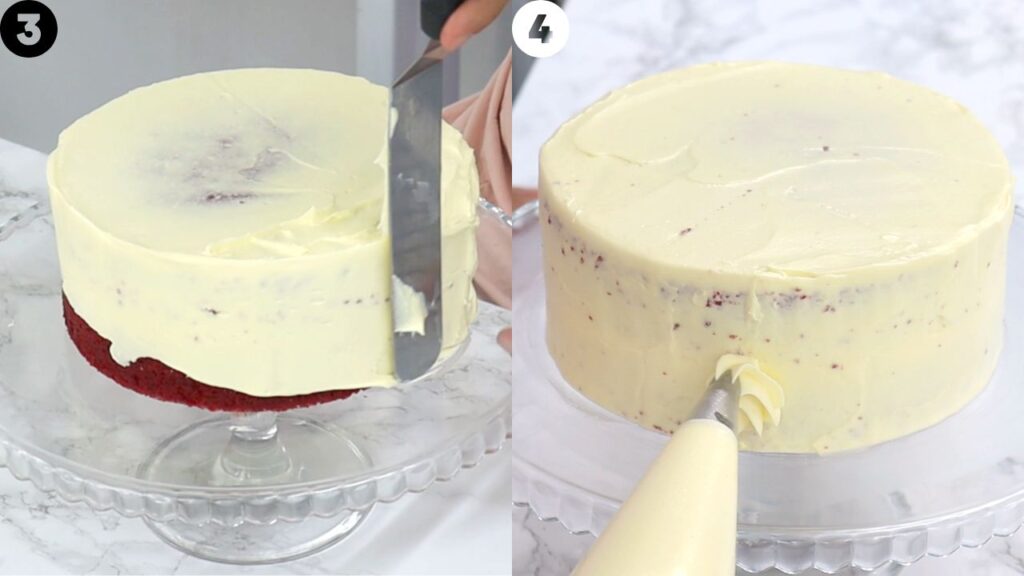
I used a 1M piping tip to pipe rosettes all around the cake! If you’re new to piping, check out my beginner’s piping tutorial or my 1M piping tip tutorial.
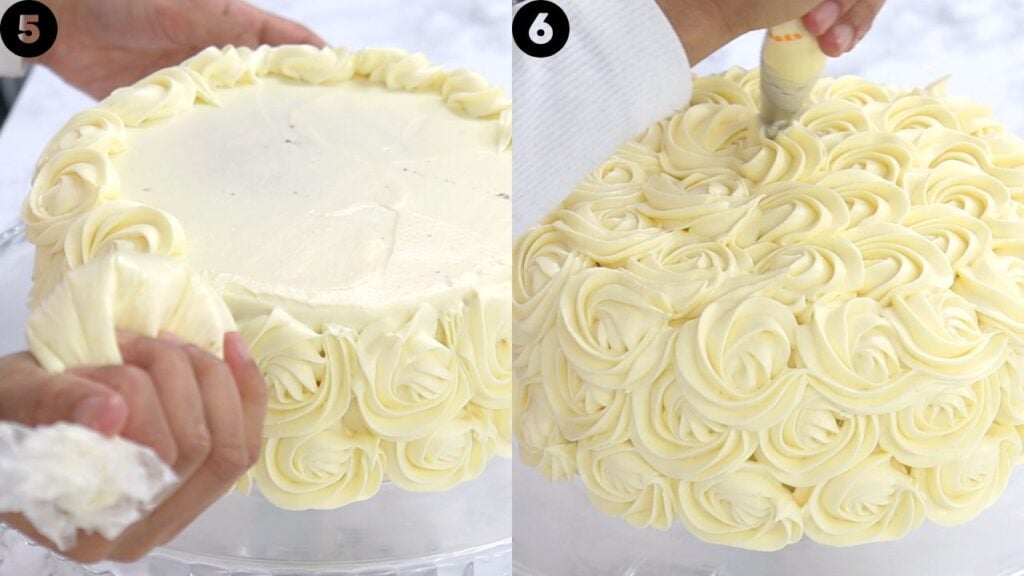
Once your cake is decorated, pop it into the fridge to allow everything to firm up. This will make it easier to cut. We don’t want the cake to be cold, though, so bring it out of the fridge about an hour or so before cutting. If it’s still cold when you cut into it, let it come to room temperature before eating. Trust me, it’s worth the wait! 😀
How to Store Red Velvet Cake
Because this cake is topped with cream cheese buttercream, I recommend storing it in the fridge. If you have leftover cake, make sure slices are covered well or stored in an airtight container, as the fridge can dry out the cake.
Can I Freeze Red Velvet Cake?
I haven’t personally tried freezing this red velvet cake, so I can’t say for certain how it will turn out, but I think it would be fine based on other similar recipes that I have frozen. If you’d like to freeze it, I recommend only freezing the cake layers and not the cream cheese buttercream, as it may split or become grainy when thawed. Wrap the unfrosted cake layers really well in plastic wrap and placing them in an airtight container or freezer-safe bag to help protect them from freezer burn. Allow them to thaw completely before decorating or serving.
Commonly Asked Questions
Why did my red velvet cake sink in the middle?
There are a few reasons why a cake can sink in the middle, including opening the oven door too early, overmixing the batter, inaccurate ingredient measurements, underbaking the cake or putting too much batter in one cake pan. If you’re having trouble with your cake sinking, I’ve put together a whole post on why cakes sink in the middle where I go through the most common causes and how to prevent them.
Can I use gel food coloring instead of liquid food coloring for this recipe?
Yes, you can use gel food coloring instead of liquid food coloring. However, because gel coloring is much more concentrated, you won’t need as much. Dilute your gel coloring with just under 3½ tablespoons of water or milk to make up for the liquid lost when using gel coloring.
This recipe uses 3½ tablespoons of liquid food coloring, but using that much gel coloring would be far too concentrated. The additional liquid also helps thin out the batter, resulting in a fluffier, more velvety cake.
Can I use a different size pan?
Yes, you can use a different size cake pan, but you’ll need to adjust the amount of batter you use depending on the size of your pan. This recipe is designed to be divided between two 8-inch cake pans, and I don’t recommend putting all of the batter into one 8-inch pan. Because this is a soft cake, too much batter in one pan can cause the center to sink as it bakes, while the edges can overbake before the center is fully cooked.
For example, 1x this recipe can also be baked as one 10-inch cake, as the larger pan provides enough surface area for the batter to bake properly. The important thing is to avoid baking a very tall cake and then torting it into layers. This red velvet cake is best baked as individual layers, which helps the cake bake more evenly and prevents the edges from becoming overbaked before the center is fully cooked.
Can I use this recipe to make red velvet cupcakes?
For a cupcake version of this recipe, check out my red velvet cupcake recipe. It’s essentially a smaller quantity of this recipe, making just enough for 12 cupcakes!
Can I use a buttermilk substitute?
Yes, a buttermilk substitute will work perfectly fine in this recipe. If you don’t have buttermilk on hand, you can learn how to make your own buttermilk substitute here.

Soft Red Velvet Cake
Print Pin VideoIMPORTANT: For accuracy, I would recommend using the gram measurements provided, as those are the exact quantities I use. Cup measurements are given as estimates (based on US cup measurements) to make it easier for those who do not have a scale.
Ingredients
Red Velvet Cake
- 2¼ cups (275 g) all-purpose flour - regular all purpose (see note 1 if you want to use cake flour)
- 2½ tbsps (18 g) cornstarch
- 2½ tbsps (14 g) cocoa powder - unsweetened. Natural cocoa powder preferred (see note 2)
- ½ tsp baking soda
- 1 tsp baking powder
- ½ tsp salt - see note 3
- 6 tbsps (86 g) unsalted butter - room temperature
- ⅔ cup (141 g) unflavoured vegetable oil - I use canola
- 1¾ cups (344 g) white granulated sugar
- 3 large eggs - room temperature
- 1 tbsp (12 g) vanilla extract/essence
- 1½ tsps white vinegar
- 3½ tbsps (38 g) red liquid food colouring
- ⅔ cup (158 g) buttermilk - room temperature
Cream Cheese Buttercream
- 1 batch of my cream cheese buttercream frosting recipe - see note 4 if piping rosettes around the cake like I have
Instructions
- Preheat oven to 350°F (180°C) conventional (see note 5 if using a convection oven with a fan) and grease and/or line two 8x3-inch cake pans (I use my homemade cake release).
- In a medium bowl, sift together flour, cornstarch, cocoa powder, baking soda, baking powder and salt. Using a whisk, mix until well combined. Set aside for now.
- In a large bowl, add the butter, vegetable oil and sugar. Using an electric mixer (see note 6), cream together for 2-3 minutes until light and creamy.
- Add the eggs one at a time, mixing well between each addition.
- Add the vanilla, vinegar and red liquid food coloring, and mix until well combined. Set the mixer aside as the remainder of the batter will be finished by hand.
- Add half of the dry ingredients to the wet mixture and gently fold together with a spatula until just combined. Add all of the buttermilk and gently fold until just combined. Lastly, add the remaining dry ingredients and gently fold until just combined. Do not overmix (see note 7).
- Divide the batter evenly between the prepared cake pans and bake for 30 minutes, or until a toothpick inserted into the center comes out clean or with a few moist crumbs. Be careful not to open the oven door too early, as this can cause the cake layers to sink (see note 8). Also, avoid overbaking the cake layers, as this can cause them to dry out.
- Allow the cakes to cool in the cake pans for 15-20 minutes before carefully turning them out onto a wire rack to completely cool. Once cooled, frost with my cream cheese frosting (see blog post above for decorating ideas). Once your cake is decorated, pop it into the fridge for 30 minutes to allow everything to firm up (see note 9).
Video
Notes
Nutrition
Nutritional information are estimates only as they are automatically calculated by a third party application. Actual values may differ based on brands and types of products used.














715 Comments
Hi MK. I’ve been looking for a good homemade red velvet cake recipe for a long time. And this is great and my kids love it. My question is about the red food coloring. 3 and a half tablespoons is a lot of food coloring. I just wanted to be sure that was correct. I mean, I’m just getting ingredients from a grocery store, food coloring is only available in the assorted four-packs. I emptied the entire container of red food coloring and it was not quite one tablespoon. So I guess I just wanted to be sure that was the right measurement. And if so, where do you get your red food coloring, what brand, etc.
Thank you again!
Hi David 😊 Thank you so much! I’m so glad you and your kids are enjoying the recipe!
Yes the amount of food colouring is correct, but I completely understand the confusion! I use Queen red food colouring, it comes in larger 50ml bottles and I got it from the supermarket here in NZ (PaknSave). If you’re using gel food colouring, I have instructions in the blog post for diluting it so you can use it in this recipe. I hope that helps! 😊
Your Red Velvet cake is to die for! Have made it a few times but today I baked it for a wedding cake! So yum!
Hi there…
Can this be made into 6 inch pans? And is powder or gel food colouring ok?
Hi Sacha! 😊 Yes you can use two 6-inch cake pans. I recommend using half of the recipe for two 6-inch pans (or 1x the recipe for four 6 inch pans). Keep the oven temperature the same, but start checking the cakes a little earlier as they will likely bake more quickly than the larger layers.
As for the food colouring, I use liquid food colouring in this recipe, but you can use gel food colouring as well. Gel colouring is much more concentrated, so you won’t need as much. You’ll need to dilute the gel colouring with just under 3½ tablespoons of water or milk to make up for the liquid lost when using gel colouring. I have the full instructions in the blog post as well. 😊
Hi! Ive been making this cake for all my potlucks. And its simply just the BEST. I want to use a 9.5inch round pan, how can i adjust this recipe for that?🥹
Hi Binal! Thank you so much! I’m so happy to hear this cake has become a potluck favourite 😀
If you mean you’d like to make one 9.5-inch round cake layer, you can use 1x the recipe as written. Keep the oven temperature the same and start checking for doneness a little earlier incase it bakes a little faster, but avoid taking the cake fully out of the oven incase the centre isn’t set yet 🙂
If you’re wanting to make two 9.5-inch layers then I would double the recipe. Hope that helps 🙂
Can I use powdered buttermilk instead of regular buttermilk, and will it change the result?
Hi Brenda! 😊 I haven’t personally tested this recipe using powdered buttermilk, so I can’t confidently recommend substituting it for regular buttermilk or say exactly how it may affect the final result. Since buttermilk contributes both liquid and acidity to the recipe, using a powdered version could potentially change the texture or consistency of the cake depending on how it’s prepared. So sorry I couldn’t be of more help!
Hi MK,
I’ve tried your recipes and they’re always a success. I want to make the red velvet cake for Christmas party on Wednesday but I was wondering if I could bake it advance say on Sunday and keep it in the fridge? Will it still taste good on the main day? Thanks in advanced 💕
Hi Pankti 😊 I’m so sorry for the very late reply! I’m so glad to hear my recipes are always a success for you!
For future reference, I’d recommend making the cake no more than 2 days ahead for the best freshness. If you’re making it ahead of time, make sure the cake layers are fully covered with frosting before storing it in the fridge, as this will help prevent them from drying out.
Before serving, take the cake out of the fridge a couple hours beforehand and allow it to come to room temperature so the cake can soften up again. Hope that helps for next time 🙂
Hi there, Can the cakes be frozen?
Hi Christiaan! 😊 Yes, you can freeze the cake layers. I haven’t personally frozen the layers from this exact recipe, but I have frozen layers from similar recipes and they’ve turned out really well. I recommend wrapping the cooled cake layers well in cling wrap and placing them into an airtight container before freezing. Enjoy!
I need to make this cake in advance can you tell me please how long this keeps for?
Hi Marion! 😊 The fully frosted cake can be kept in the fridge for up to 1 week, but for the best freshness, I recommend serving it within 1–2 days of making it. Make sure the cake layers are completely covered with frosting before storing in the fridge so they don’t dry out.
If you’re only making the cake layers ahead of time, allow them to cool completely, then wrap them well in cling wrap and place them in an airtight container. They can be kept at room temperature for a day before decorating for optimal freshness 🙂
made this cake for my family yesterday and they all loved it so much!! could not recommend more they all said it was the best red velvet cake they’ve tasted, it really was an amazing recipe thank you so much
I made this cake and there was no red in it. It was all chocolate what happened
Hi Holly 😊 I’m sorry to hear that! The cake should definitely have a red colour rather than looking completely like a chocolate cake. I’d first double check that you used the recommended amount of red food colouring and that it was a concentrated liquid colouring suitable for baking. I’d also double-check which type of cocoa powder you used, as Dutch-processed cocoa powder can give the cake a much darker colour. Hope that helps for next time 🙂