 - Cakes by MK")
 - Cakes by MK")
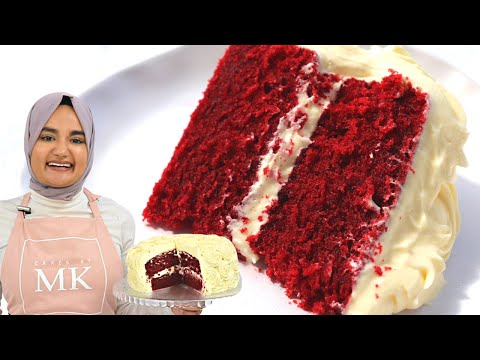
Okay I am SO EXCITED to finally be sharing my red velvet cake recipe! This red velvet cake is so incredibly soft, full of flavor and is topped with the most delicious cream cheese buttercream. It has a super velvety texture and slightly tart, yet sweet and creamy frosting – making it the best red velvet cake recipe I’ve tried!

What exactly is a red velvet cake?!
A red velvet cake is a combination of a vanilla and chocolate cake, with a distinct tangy taste. This is due to the buttermilk and vinegar (which are common ingredients in a red velvet cake).
Traditionally, red velvet cakes didn’t have any red food coloring, and were a more brownish, reddy colour. This natural red colour was due to the chemical reaction between non-dutched cocoa powder and the acidic ingredients (white vinegar and buttermilk).
Red velvet cake is often paired with cream cheese frosting (which I have done for this cake) or ermine frosting.

How to make red velvet cake
This cake comes together really easily! Just be sure to follow the steps exactly as stated.
Begin by preheating your oven to 160°C fan forced, and grease and/or line two 8 inch cake pans (I like to use my homemade cake release). If your oven doesn’t have a fan option, then you will need to increase the baking temperature to 175°C/350°F.

For the cake batter, start off by sifting together flour, cornstarch, cocoa powder, baking powder, baking soda and salt. By premixing our dry ingredients, it helps ensure that everything is mixed well, preventing us from overmixing our batter when we come to combining our wet ingredients with the dry, later on in the recipe.

Set your dry ingredients aside and in another bowl cream together butter, oil and sugar with a hand mixer (or stand mixer) for 2-3 minutes on a medium-high speed. This is going to incorporate air into our batter, which will give us a fluffier cake!

Next add in eggs one by one, mixing well in between each addition. Eggs add structure and moisture to our cake.

Next add in vanilla extract or essence, white vinegar and red liquid food coloring and mix until well combined.

Now the last step is to fold in our dry ingredients while alternating with 3/4s of a cup buttermilk. So to do this, add in half of your flour mixture and fold it into the wet mixture until just combined. Then add in your buttermilk, and fold that through until just combined. Lastly, add in your remaining dry ingredients and fold through until just combined.
It’s important to do this step by hand as this will prevent us from overmixing our batter and developing too much gluten. Gluten is what gives bread great structure, and although we want SOME structure for cakes, we don’t want too much otherwise it’ll make our cake tough and dense.


Once the batter is done, evenly distribute it into the two 8 inch cake tins and cook for 30 minutes, or until a toothpick comes out clean. Allow the cakes to cool in the cake tins for 20 minutes, before turning them out onto a cooling rack. Allow to completely cool before frosting.

How to decorate your cake
There’s no particular way to decorate a red velvet cake, but here’s how I did mine using my cream cheese frosting recipe 🙂
Now usually I would trim (or torte) the tops of my cake layers with a serrated knife to make them flat, but these red velvet layers bake up really nice and flat so no trimming was required. So I went ahead and added a generous amount of frosting to my first cake layer and smoothed it out with my offset spatula. I then placed the next cake layer on top.

I then placed some frosting on my top cake layer and spread it out with my offset spatula. I then used the excess frosting on the sides to cover the entire cake. I only did a thin layer of frosting and didn’t worry about a crumb coat because I was piping rosettes all around the cake. If you also want to pipe rosettes, then you will need to make 1.5x my cream cheese frosting recipe to ensure you have enough frosting.

I then used a 1M piping tip to pipe rosettes all around the cake! If you’re new to piping check out my beginner’s piping tutorial or 1M piping tip tutorial.

Once your cake is decorated, pop it into the fridge to allow everything to firm up. This will make it easier to cut. We don’t want cold cake though, so bring it out of the fridge about an hour or so before it’s going to be cut. If it’s still cold when you cut through it, then let it come to room temperature before eating. Trust me, it is worth the wait 😀
Commonly Asked Questions
Can I use gel food coloring instead of liquid color for this recipe?
Yes, you can use gel food coloring in replacement of liquid coloring, however you will need to dilute the gel colour with just under 3 1/2 tablespoons of water or milk to make up for the liquid lost when using gel colors. This recipe requires 3 1/2 tablespoons of liquid colour, however if using gel colours you won’t need that much as gel colours are concentrated. Additional liquid helps to thin out the batter and results in a fluffier, more velvety texture in your final cake.
Can I use this recipe to make red velvet cupcakes?
For a cupcake version of this cake, check out my red velvet cupcake recipe. It’s basically a smaller quantity of this recipe – just enough to make 12 cupcakes!
Can I use a buttermilk substitute?
A buttermilk substitute will work fine for this recipe. Check out how to make your own buttermilk substitute here.

Soft Red Velvet Cake
Print Pin VideoIMPORTANT: For accuracy, I would recommend using the gram measurements provided, as those are the exact quantities I use. Cup measurements are given as estimates (based on US cup measurements) to make it easier for those who do not have a scale.
Ingredients
Red Velvet Cake
- 2¼ cups (275 g) flour - regular all purpose (see note 3 if you want to use cake flour)
- 3 tbsp (18 g) cornflour - also known as cornstarch
- 3 tbsp (14 g) cocoa powder - unsweetened
- ½ tsp baking soda
- 1 tsp baking powder
- ½ tsp salt - omit if using salted butter
- 6 tbsp (86 g) unsalted butter - room temperature
- ¾ cup (141 g) unflavoured vegetable oil - I use canola
- 1¾ cups (344 g) white granulated sugar
- 3 large eggs - room temperature
- 1 tbsp (12 g) vanilla essence/extract
- 1½ tsp white vinegar
- 3½ tbsp (38 g) red liquid food colouring
- ¾ cup (158 g) buttermilk - room temperature
Cream Cheese Buttercream
- 1 batch of my cream cheese buttercream frosting recipe - see note 4 if piping rosettes around the cake like I have
Instructions
- Preheat oven to 160 °C (320°F) with the fan on (see note 7 if you don't have a fan function) and grease and/or line two 8 inch cake tins (I use my homemade cake release).
- In a bowl, sift together your flour, cornflour, cocoa powder, baking soda, baking powder and salt. Using a whisk or fork, mix until well combined. Set aside.
- In another bowl, add in your butter, vegetable oil and sugar. Using an electric mixer (hand or stand mixer are both fine - see note 6), cream together for 2-3 minutes until light and creamy.
- Add in eggs one by one, mixing well in between each addition (about 10-15 seconds between eggs).
- Add in your vanilla, vinegar and red liquid food colour, and mix until well combined. Now set your mixer aside as the remainder of the batter will be finished by hand.
- Finish off by adding in half of your premixed dry ingredients to your wet mixture, and gently fold it in with a spatula until just combined. Then add in all of your buttermilk, and fold it in until just combined. Lastly, add in the remaining dry ingredients and gently fold it into the mixture until just combined. Do not overmix (see note 1).
- Distribute the batter evenly into the two 8 inch cake tins, and bake for 30 minutes or until a toothpick comes out clean. Be careful not to open the oven door too early otherwise this can cause the cake layers to sink (see note 2). Also avoid overbaking the cake layers otherwise they will dry out.
- Once baked, allow them to cool in the cake tins for about 15-20 minutes, and then turn them out onto a wire rack to completely cool before frosting with my cream cheese buttercream frosting. For tips on how to frost your cake, check out the blog post above where I walk you through how I decorated mine with pictures, or watch my YouTube video below 🙂
Video
Notes
Nutrition
Nutritional information are estimates only as they are automatically calculated by a third party application. Actual values may differ based on brands and types of products used.


574 Comments
This looks absolutely delicious, but I am a beginner and I don’t have cake pans or an oven, is there any way I could make this in the air fryer or the stove? I have tried cupcakes in the oven and a one-layer cake on the stove, and they both turned out amazing! But I don’t know if it’ll work with the red velvet cake can someone please help me!!
Hi Rameen! Glad to hear you’re interested in giving this recipe a go 🙂 unfortunately I haven’t tried making this in an air fryer or on the stove so I can’t provide any recommendations at this stage sorry! An air fryer acts similar to an oven so that may be your best bet 🙂
Hi MK!
I haven’t tried this recipe but from what I’ve seen this recipe is a killer! I hope to make this soon but I need some tips on what would be a good ratio to follow for a 9 inch cake? Thanks in advance you’re a doll
Hi Jo! Glad to hear you’re interested in giving the recipe a go 😀 if you’re wanting to make a single layer 9 inch cake then half the recipe, or for a double layer 9 inch cake then you can use the same amount stated in the recipe the only thing is your layers will be slightly thinner and you want to check your cakes about 5 mins earlier than the stated cooking time. If you want thicker cake layers then you could make 1.5x the recipe for two 9 inch pans, the layers will be just a tiny bit thicker than mine and may just take an extra 5 mins or so to cook through 🙂 hope that helps!
I wan to try this recipe for my family but I don’t know how to double recipe… please,can you explain
Hi there! 🙂 On the recipe card you can click the ‘2x’ option and it will provide you with the amounts for doubling the recipe 🙂 just remember to use four 8 inch cake tins not two otherwise there will be too much batter in one tin 🙂
I made this cake over the weekend and it was delicious. I adjusted the batter by 1/3 and made two 6″ cakes that I torted into four layers. I also used cake syrup to ensure the layers stayed moist. I used 1/4 sugar to 1/2 water.
The layers baked up fairly flat, so I didn’t cut off the tops. I used the convection setting on my oven which lowers the temperature 25 degrees automatically so took about 37 minutes to finish baking. Going forward I will put the starting temp at 350 instead of the 320 f conversion.
All in all, very attractive cake and will definitely make again.
Hi Cindy! So glad to hear you enjoyed the recipe and that it worked well with the amendments 😀 and increasing the baking temperature sounds like a good idea if your oven automatically reduces the temperature by 25 degrees, this should reduce the cooking time 🙂
Thanks again for trying out the recipe! 🙂
I can’t wait to try this recipe! Question: if I wanted to make cupcakes instead of a layered cake, would this recipe work just the same? I imagine the baking time would differ a little but am not sure. Thank you!
Hi Nicole! I haven’t tried this recipe as cupcakes yet but others have with success 🙂 yes the cooking time will reduce so you want to check them earlier than the stated cooking time (the exact time I’m not sure sorry for this recipe!). I do have a red velvet cupcake recipe coming out soon (hopefully next week!) which will have the amended quantities and cooking time 🙂
Hi! Thank you so much for your response! I want to make red velvet cupcakes for the holidays and your recipe looks the absolute best so far for the cake so I can’t wait for your cupcake recipe! 🙂
Excellent recipe MK loved it!! I have a question ..I tried the red velvet recipe you posted earlier with 180 gram flour. This one seems a bit different in terms of ratio of baking powder and soda as well as coco powder. Will there be any difference of texture or will it be same. As I am happy with the result of last recipe but to make a bigger batch I thought of trying this one.
Thanks
Hi Maddy! So happy to hear you enjoyed the recipe 🙂 and my older red velvet cake recipe (which uses the 180g of flour), is very very similar to this one, however in my opinion my new version is slightly better texture and taste wise 🙂 I think it really will come down to your personal preference but the differences are slight so you may not even notice a difference 🙂 would love to hear how you go!
Hi I made this cake 3 times already and it was so delicious! My favorite recipe!😍 I had a question can I use the same batter to make red velvet truffels? Thankyouu😊
Hi Par! So happy to hear you’re loving the recipe 😀 and I’ve never tried myself but I imagine it should work fine 😀
My friends and family loved this cake. Be sure to follow the directions and the cake will turn out great. Weighing the ingredients makes a difference 😊
Thanks for the wonderful feedback Toni! So glad to hear you and your family loved the cake 🙂 and yes absolutely! Weighing is always the way to go especially when it comes to baking 😀
Can I use self raising flour instead of all purpose flour? I am baking a cake for my little brother tomorrow and he absolutely loves red velvet
Hi Jasmine! I haven’t tried self raising flour as a substitute for this cake recipe so I can’t say for sure if it’ll work sorry! If you do decide to try it out then remember to leave out the baking powder and baking soda 🙂
Hello, thank you for this awesome recipe, please can I still add the vinegar after making my buttermilk with lemon juice and milk? Thanks.
Hi Atobatele! Yes still add the additional vinegar 🙂 hope you enjoy the recipe!
Hi, I love the cake too. So thanks for recipe. Though I was wondering if I can substitute buttermilk with something else?
Hi Zipporah! 🙂 You can use a homemade buttermilk if you can’t easily access it. Simply add a tablespoon of white vinegar or lemon juice to a cup of milk and let it sit for 10 minutes :). Hope you enjoy the recipe!
I’m making this cake tomorrow it looks so good😍. I was only wondering if the cake won’t be too sweet because of the amount of sugar? Thanks😊
Hi Par! 🙂 I would say the sweetness level is in the middle, so not too sweet, but it does have a sweetness too it if that makes sense haha! You can reduce the sugar slightly if you like but this may affect the texture a little as the sugar also helps to keep the cake moist :). Hope you enjoy the recipe!