

Let’s be honest, a homemade pie crust can sound a little intimidating… but I promise this super easy recipe will leave you never wanting to buy a store-bought one again! This recipe is simple, buttery, and flaky, and made with just a handful of basic ingredients. The result? A golden, melt-in-your-mouth crust that works beautifully for both sweet and savory pies.

There’s a Lot to Cover!
Okay, there’s actually a lot to cover in this post! 😅 From my top tips for getting that perfectly flaky crust to how to blind-bake it, store it, flute the edges, and even make it without a food processor, I’m covering all the little details to help you get the best results.
Here’s a quick look at what we’ll go through:
– Why This Is the Best Ever Pie Crust
– My Top Tips for the Perfect Pie Crust
– How to Make Pie Crust
– How to Blind-Bake or Par-Bake Pie Crust
– How to Store Pie Crust
– How to Flute Pie Crust
– How to Make an Egg Wash for Pie Crust
– How to Make Pie Crust Without a Food Processor
– Tips for Making Sweet and Savory Pies
– And, of course, the full pie crust recipe!
So if you’re just here for the recipe, you can jump straight to the recipe card. But if you want to know exactly how to get the best, flakiest, most buttery pie crust, keep reading! 🙂
Why This Is the Best Ever Pie Crust!
You know those recipes that aren’t necessarily the most popular on your blog, but you really wish more people would try them because you know just how good they are? This is one of those recipes for me! Honestly, it’s one of my favorite recipes on the blog. This pie crust genuinely earns the title of best ever pie crust! If you’ve ever tried my apple pie recipe that uses this crust, you know what I’m talking about. Here’s why I think you’re going to love it:
– Buttery: This is an all-butter pie crust, so there’s no shortening needed! The butter gives the crust an incredible rich, buttery flavor and that delicious melt-in-your-mouth texture.
– Flaky: The secret to those beautiful flaky layers? Cold butter! Keeping the butter cold creates little pockets of butter throughout the dough, which puff up as the crust bakes and give you that irresistible flaky texture.
– Easy: Making pie crust doesn’t have to be intimidating! With a food processor, you can have the dough ready in just 2 minutes, using only a handful of basic ingredients. Seriously, it’s so much easier than you might think! Don’t have a food processor? Don’t worry, you can also make this crust by hand with no special equipment! Instructions further down 🙂
My Top Tips for the Perfect Pie Crust
I promised you an easy pie crust recipe, and it really is! But there are a few little things that can make all the difference when it comes to getting that perfectly flaky, buttery, melt-in-your-mouth crust. Here are my top tips:
Use Cold Butter
This is probably the most important tip! You want your butter to stay nice and cold while you’re making the dough. Cold butter creates little pockets throughout the dough, which release steam in the oven and create those beautiful flaky layers.
If the butter gets too warm and starts melting into the flour, you’ll lose those pockets of butter and can end up with a denser crust. So when in doubt, keep that butter cold!

Use Ice Water
For the same reason, you want to use ice-cold water when making your dough. It helps keep the butter cold while you’re bringing everything together, which means a flakier crust once it hits the oven.
Don’t Overmix
Once the dough starts coming together, stop mixing! You want the ingredients to be combined, but don’t worry if the dough still looks a little rough or shaggy.
Chill Before Baking
This recipe calls for chilling the dough before rolling it out, and I also recommend giving the crust another chill once it’s in the pie dish, whether that’s before and/or after filling it.
You want that pie crust to be nice and cold when it goes into the oven. This helps prevent the butter from melting too quickly and gives you the best chance of getting those beautiful flaky layers!
How to Make Pie Crust
You can find the full list of ingredients in the recipe card at the end of the blog post (for easy navigation, hit the ‘jump to recipe’ button at the top of the blog post). Here is a quick visual breakdown of the recipe (recipe video is also provided in the recipe card below).
To a food processor, add in flour, salt and sugar. Pulse a few times until well combined.
Add in cold unsalted butter and pulse until you have coarse crumbs, with little bits of butter throughout the mixture.
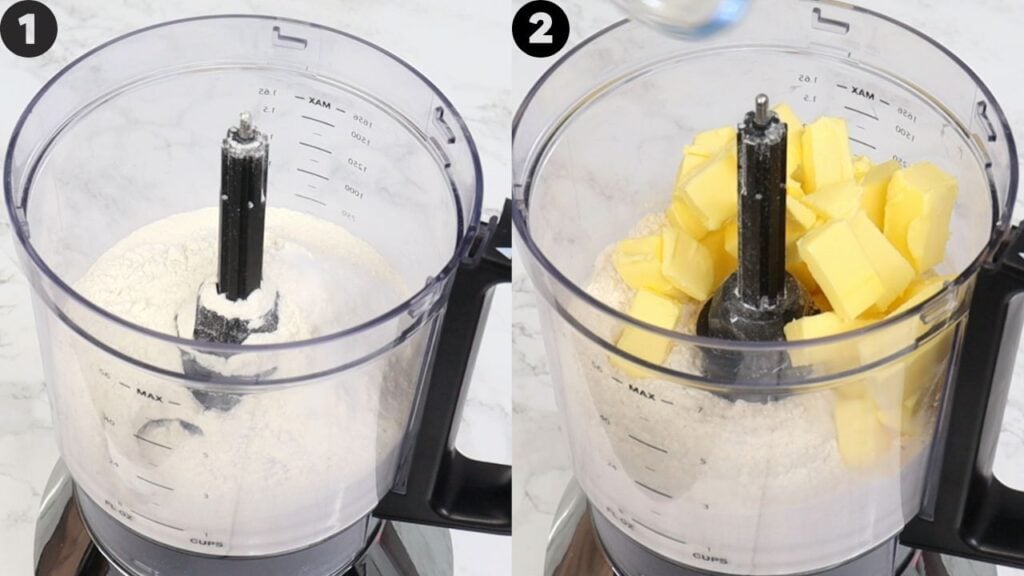
Next, add 5 tablespoons of ice-cold water and pulse until the mixture begins to form large crumbs or small clumps of dough. Be careful not to overmix. To test, squeeze a small amount between your fingers—if it holds together and forms a dough, it’s ready. If the mixture is still slightly dry, add a little more water, pulsing briefly until just combined. Test again, and only add more water if necessary to bring the dough together. You don’t want any more water than you need.
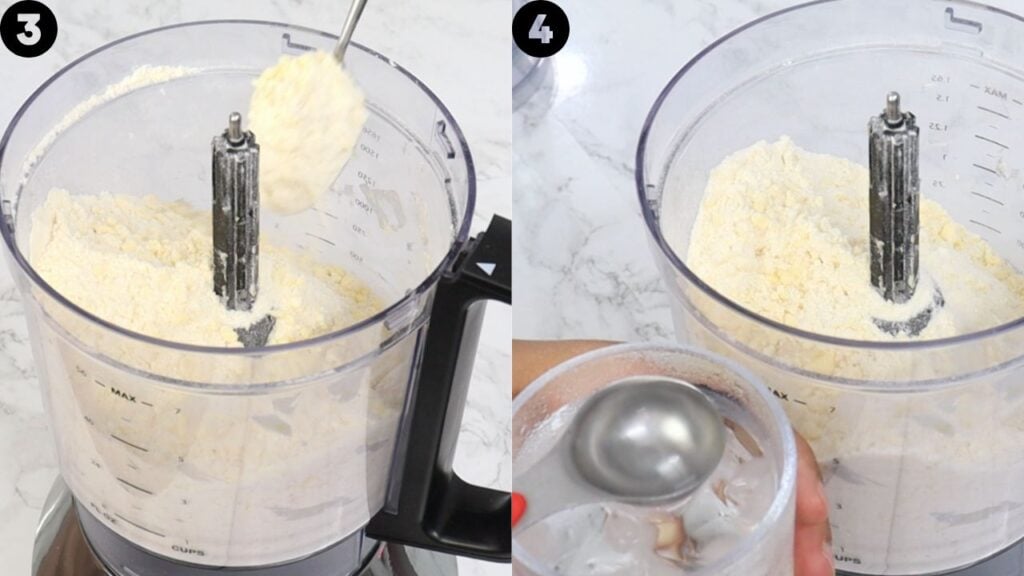
Turn the mixture out onto a lightly floured surface and gently gather it together with your hands. Do not knead it; simply press the dough until it forms a ball, taking care not to overwork it. It’s perfectly fine if the dough looks a bit rough rather than smooth.

Once the dough comes together in a ball, divide it in half and gently shape each half into a disk. Take care not to overwork the dough.
Wrap each disk in plastic wrap and refrigerate for one hour before using. If you only need one crust, store the second disk in an airtight container and freeze for up to 3 months.
How to Store Pie Crust
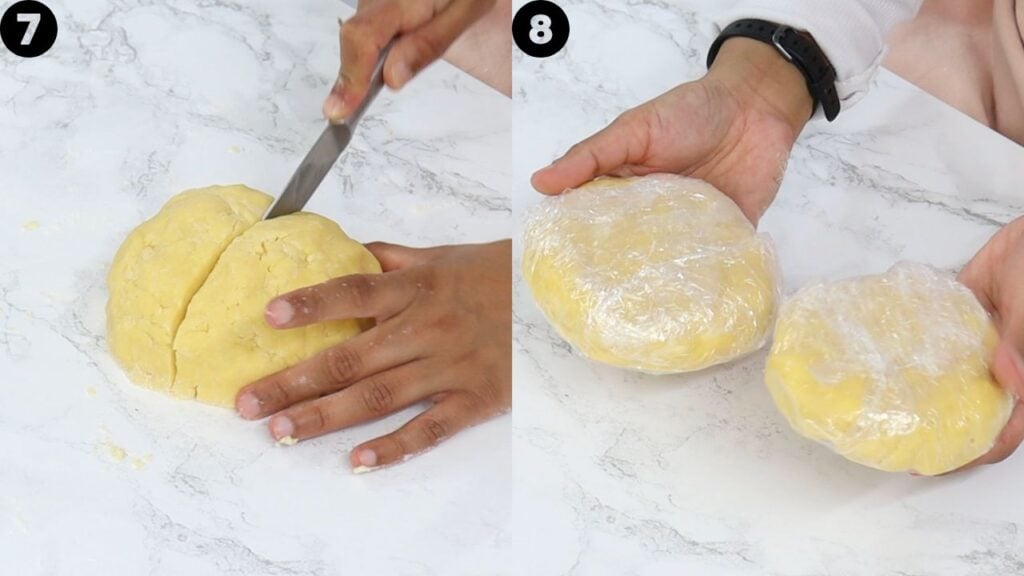
This recipe makes two 9-inch pie crusts, which is perfect for pies like my apple pie that use both a top and bottom crust. If you only need one, simply place the other crust in an airtight container and freeze it for up to 3 months. Thaw it in the refrigerator before using.
You can also make the pie crust dough ahead of time and keep it in the refrigerator for up to 5 days. If it feels too firm to roll, let it sit at room temperature for about 15 minutes or so to soften slightly. You still want the dough to be cold and firm, so don’t let it get too soft!
How to Blind-Bake Pie Crust (or Par-Bake)
Some pie recipes call for blind baking, or par-baking, the crust before adding the filling. It might sound a little fancy, but it’s actually pretty straightforward! Here’s exactly how I do it:
Prepare the Crust: On a clean work surface, roll your chilled pie crust dough into a 12-inch circle. Gently roll the dough onto your rolling pin, then unroll it over a 9-inch pie pan. Fit the dough into the pan without stretching it, then trim any excess and crimp or flute the edges as desired. I show you how I flute the edges in the how-to video.
Chill: If it’s a warm day and it feels like the dough is softening quickly, pop the prepared pie crust into the refrigerator for 30 minutes. This helps firm up the butter and prevents the crust from shrinking as it bakes.
Preheat the Oven: While the dough chills, preheat your oven to 400°F (200°C).
Add Weights: Line the chilled crust with parchment paper or aluminum foil, then fill it as high as you can with pie weights, dried beans, or uncooked rice. This helps keep the crust from puffing up or shrinking in the oven.
Bake: Bake the crust for 15–20 minutes, or until the edges are lightly golden.
Remove the Weights: Carefully remove the parchment paper and pie weights. Use a fork to prick the bottom of the crust, also known as docking. This allows steam to escape and helps prevent the bottom from puffing up.
Return the crust to the oven to finish baking. For a par-baked crust, bake for another 5 minutes, just until the bottom is beginning to brown. For a fully baked crust, bake for another 15 minutes, or until the bottom is golden and fully cooked.
Cool: If you’re fully baking the crust, let it cool completely before adding your filling.
How to Flute Pie Crust
Fluting the edges of a pie crust is one of my favorite little finishing touches! It makes your pie look so pretty and honestly makes you look like a pie-making pro, but it’s actually really easy. Check out the recipe video for a visual demonstration on how to do this.
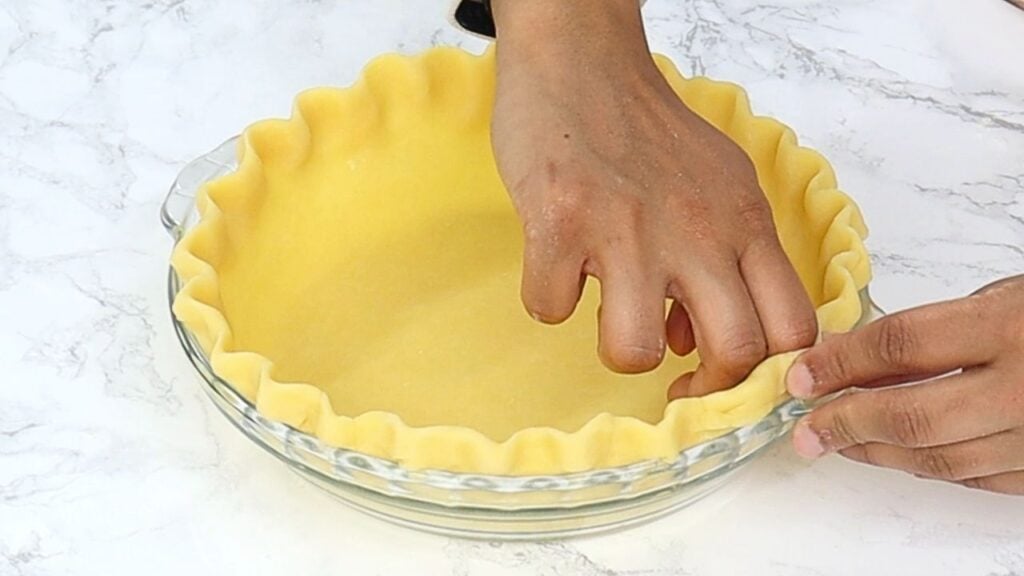
Start by rolling your chilled pie crust dough into a 12-inch circle. Gently roll the dough onto your rolling pin, then unroll it over a 9-inch pie pan. Trim any excess dough, leaving about a ½-inch overhang around the edge. Gently fold the overhang underneath itself to create a thicker edge.
Now for the fun part! Place your index finger on the inside edge of the crust. Using the thumb and index finger of your other hand, gently pinch the dough around your finger to create the fluted shape. You can also use your knuckles to help shape the edge if that feels more comfortable. Keep repeating this motion around the entire edge until you’re done. I demonstrate exactly how I do this in the how-to video.
If you’re making a lattice crust on top like my blueberry pie recipe, you can use the same pie crust recipe for the lattice strips and bottom crust.
How to Make an Egg Wash for Pie Crust
Want that beautiful golden-brown finish on top of your pie? An egg wash is the way to go! It’s super simple to make and gives your pie crust that gorgeous, glossy finish.
Whisk 1 large egg in a small bowl until well combined. Once you’ve assembled your filled pie, use a pastry brush to lightly brush the egg wash over the top of the dough. Make sure to coat it evenly, including the edges, but try not to let the egg wash pool in the crevices.
I recommend adding a few small vents to the top of the dough before brushing it with egg wash. This allows steam to escape while the pie bakes and is especially important for fruit-filled sweet pies.
Can I Make the Pie Crust Without a Food Processor?
Absolutely! While I love using a food processor because it makes this pie crust recipe super quick and easy, you can definitely make it without one. A pastry cutter works perfectly, and technically, you can even use your hands. It’ll just be a little more of a workout! 🙂
Here’s how to make it with a pastry cutter:
Combine the Dry Ingredients: In a large mixing bowl, whisk together the flour, sugar, and salt until well combined.
Add the Butter: Add the cold, cubed butter to the dry ingredients.
Cut in the Butter: Use a pastry cutter to press down into the butter and flour mixture, cutting the butter into smaller pieces. Work in a rocking motion and make sure the butter gets coated in flour. You can also use your fingers to rub the butter into the flour, working quickly so the butter stays cold. Keep going until the mixture resembles coarse crumbs with some pea-sized pieces of butter still visible.
Add the Cold Water: Gradually add the ice-cold water, one tablespoon at a time, gently mixing with a fork after each addition. You may need slightly more or less water depending on your flour and the environment, so add it gradually and stop as soon as the dough starts coming together. Remember, less water is better than too much when it comes to pie crust!
Bring the Dough Together: Once the dough begins to form, use your hands to gently gather it into a ball. Be careful not to overwork it, and remember: no kneading! 🙂
Chill the Dough: Divide the dough into two pieces and flatten each one into a disk. Wrap them in plastic wrap and refrigerate for at least 1 hour before rolling and placing them into your pie dish.
A Note on Sweet vs. Savory Pies
This all-butter crust works beautifully for both sweet and savory pies. I especially love it for sweet pies like my blueberry pie, where that rich, buttery flavor pairs so well with fruit and other sweet fillings.

Best Pie Crust Recipe (Easy, Buttery & Flaky!)
Print Pin VideoIMPORTANT: For accuracy, I would recommend using the gram measurements provided, as those are the exact quantities I use. Cup measurements are given as estimates (based on US cup measurements) to make it easier for those who do not have a scale.
Ingredients
- 2½ cups (300 g) all-purpose flour
- 1 tsp salt
- 2 tsps white granulated sugar
- 1 cup (226 g) unsalted butter - cold and cut into small cubes
- 5 tbsps ice-cold water
Instructions
- To a food processor, add in flour, salt and sugar. Pulse a few times until well combined.
- Add in cold butter (see note 1) and pulse until you have coarse crumbs, with little bits of butter throughout the mixture.
- Next, add 5 tablespoons of ice-cold water and pulse until the mixture begins to form large crumbs or small clumps of dough. Be careful not to overmix. To test, squeeze a small amount between your fingers—if it holds together and forms a dough, it’s ready. If the mixture is still slightly dry and won't hold together when squeezed between your fingers, add a little more water, pulsing briefly until just combined. Test again, and only add more water if necessary. You don't want any more water than you need (see video for what the consistency of the dough should look like if unsure).
- Turn the mixture out onto a lightly floured surface and gently gather it together with your hands. Do not knead it; simply bring the dough together, pressing gently until it forms a ball, taking care not to overwork it. It’s perfectly fine if the dough looks a bit rough rather than smooth.
- Once the dough comes together in a ball, divide it in half and gently shape each half into a disk. Take care not to overwork the dough.
- Wrap each disk in plastic wrap and refrigerate for one hour before using (see note 2). If you only need one crust, store the second disk in an airtight container and freeze for up to 3 months.
Video

Notes
Nutrition
Nutritional information are estimates only as they are automatically calculated by a third party application. Actual values may differ based on brands and types of products used.













37 Comments
5
Thanks so much Jeanette! So glad you loved the recipe 😀
First time ever made pie crust! So glad that I came across with this recipe! So so easy!!!! Definitely a keeper!!! Amazing!!!! Thank you for sharing your recipe!
Yay! So happy to hear you loved it Ava 😀
Recipe is great, but if you’re making two pies and you want nice full crust, I’d recommend doubling recipe and save the rest of the dough for designing the top of your two pies with lattice or cutouts.
Hi Jesenia 😊 Thank you so much for the tip! I’m so glad you enjoyed the recipe, and I love the idea of doubling the recipe if you want extra dough 🙂
This is great! And so simple my 11 year old daughter uses this recipe all the time now! Thank you!
Awesome! So happy to hear you and your daughter love the recipe Emily 🙂
One more tip that I think should be mentioned (based on my experience making this recipe): If the butter is melting between your fingers as you combine the dough, it’s too warm. Put it back in the fridge for 5 minutes and then continue. This recipe is excellent; great job!
Great tip Karen! I’ll add that to the blog post 🙂
So glad you loved the recipe!
May I know,what size of the pie tray ?
Great question! This recipe makes two pie crusts for a 9-inch pie dish. I’ll add that to the recipe 🙂
Enjoy!
What are other alternatives aside from pastry cutter and/or food processor? Tried vitamix and it warmed my cold butter making the dough soooo wet. Ugghh.
Hi Maida! 🙂
You could use your fingers to rub the butter into the dry ingredients (like when making scones). It is a bit harder to do, but should still result in a beautiful pie crust – just be sure not to overwork the butter into the flour 🙂
Hope that helps for next time!
I have used a fork in the past!
Too much flour it’s like not together at all I have to keep put more water I’m going to wreck up my crust
Hi Dianna! 😊 I’m sorry you’re having trouble with the dough! The dough should come together, but you may need to add a little extra water depending on how the flour was measured. I recommend using the gram measurements in the recipe for the most accurate results, as this will give you a more consistent amount of flour.
If the dough still seems too dry, add the water very gradually, about 1 teaspoon at a time, and gently mix until the dough just comes together. You don’t want to add too much water at once, as this can make the crust tougher 🙂
Maida,
You can take two knives and crisscross them in a cutting motion, in the flour/butter mix until you get the same results. It’s easy to do.
Maryam,
I used your pie crust recipe for my eggnog pumpkin pies this Thanksgiving and they turned out fabulous! Thank you so much for sharing your recipe. Next, I’m going to make your apple pie recipe for my grandson’s birthday party next month. He loves apple pies and yours look divine! Then I’m making your eggless lemon curd because although I love lemon curd and use it in many of my recipes, I’m not fond of the egg taste. I will continue to use your recipes as you are a great cook! Thanks again.
Aww thank you so much Rose! So glad you’re loving the recipes 😀
A fork or two butter knives also work. Unless your hands are cold, fingers will warm the butter as well.
This is the best crust recipe I have ever tasted! I always thought my wife had the best tasting crust recipe ever, but I made this one (although I increased the recipe by 1/2 on all ingredients) and hands down everyone is asking me for it. I would say I found if you add in 1/2 vodka and water, you can work your dough all day and not worry about bad crust from over working.
Thank you for sharing your recipes. You are my go to webpage for new dessert recipes, I tell all my
daughters the same thing, “go here” before checking anywhere else. I have never made a bad recipe from your website.
Roger (new baker)
Aww thank you so much for the wonderful feedback Roger! So happy you’re finding success with my recipes, especially as a new baker! Sounds like you’re doing a great job 🙂
I use frozen butter and shred it on the cheese grater. Hard work but turns out perfectly! That’s how my grandmother always did it. No fancy tools used here!
I need to try this one day!! Such a good idea 😀
You could freeze the butter and shred with a cheese grater as well!
I was skeptical at first, but this pie crust really is as easy as promised! The texture was perfect – crisp on the edges and tender in the center. I filled mine with a savory quiche filling, and it held up beautifully without getting soggy. I think it would work for both sweet and savory pies, which is a bonus. This recipe deserves a spot in every baker’s collection!
So so happy to hear you loved the recipe Annie! It’s my fav pie crust recipe so I’m thrilled you enjoyed it 😀
Looks delicous . Great receipe for the dough, wish you would’ve given for the filling.
Thanks so much! 🙂 I recently shared my apple pie recipe using this recipe if you wanted to check that out! Here is the link: https://cakesbymk.com/recipe/apple-pie-recipe/
Enjoy 🙂
Hi,
Thanks. It seems awsome. Can you suggest any filling? like apples. How should prepare fillings?
Thanks Maryam! I shared my apple pie recipe a few weeks a go which works amazingly with this crust! Here is the link to the recipe if you wanted to try it out 🙂 https://cakesbymk.com/recipe/apple-pie-recipe/
Enjoy!