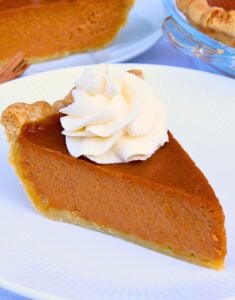
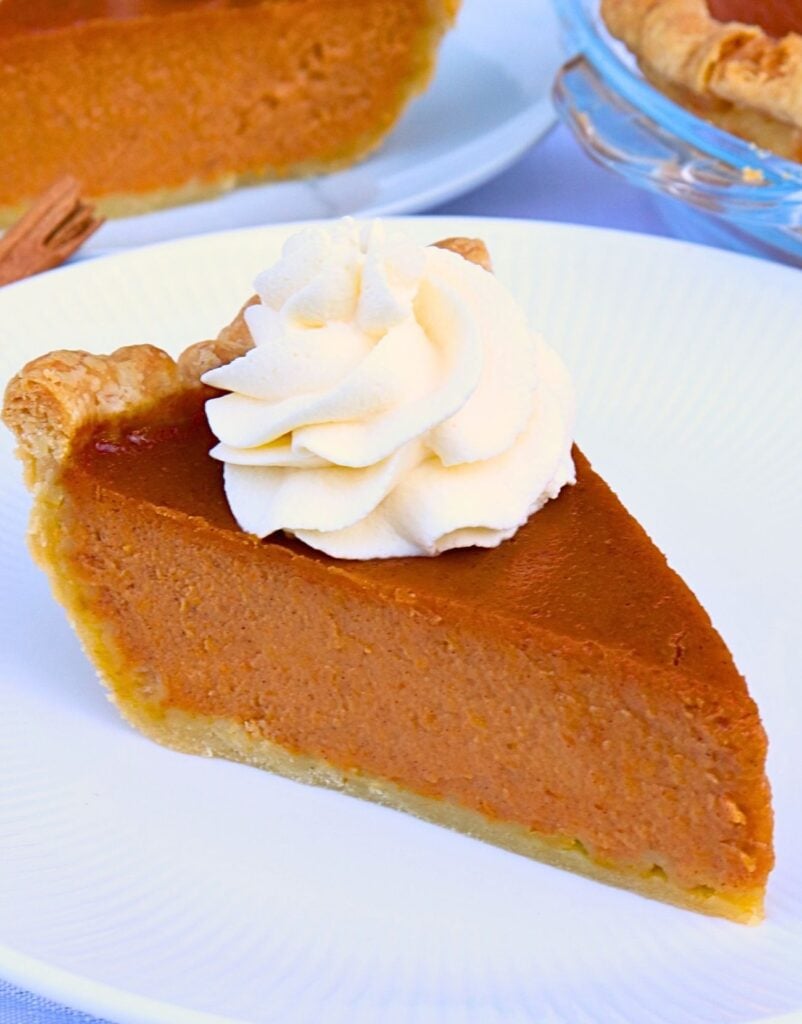
After three years of testing, I’m SO excited to finally share my homemade pumpkin pie recipe! It has a rich, creamy pumpkin filling, perfectly balanced with warm spices, all baked into a buttery, flaky pie crust. It’s genuinely one of the best pumpkin pies I’ve ever tried!
Developing This Pumpkin Pie Recipe
I’ve been working on this pumpkin pie recipe for three years! Every holiday season, I’d give it another try, but it never quite turned out how I wanted. Sometimes the filling was too pumpkin-heavy, wouldn’t set properly, or I couldn’t quite perfect the bake time. Other times, the crust wasn’t cooked through. After plenty of trial and error, I finally found the combination that gave me the best tasting pie and the most consistent results.
One of the biggest changes I made was adjusting the filling. I wanted to increase the fat content, as this helps create a richer, creamier filling and reduces the risk of it splitting or cracking as it bakes. I decided to substitute some of the evaporated milk with heavy cream, but kept some evaporated milk in the recipe because I really liked the flavor it added. I also changed the eggs from three whole eggs to two whole eggs and one egg yolk. This reduces the amount of egg white protein in the filling while keeping enough egg to help it set, resulting in a smoother, more delicate texture. Finally, I added a little cornstarch to help stabilize the filling and give it a better set.
Along with these changes, I found that thoroughly blind baking the pie crust and baking the filling gently and gradually gave me the most consistent results. Getting the crust properly baked and the filling to set without overbaking made all the difference.
After three years of testing and tweaking, I’m honestly SO happy with how this recipe turned out. It has the most beautifully smooth, creamy pumpkin filling and a buttery, flaky crust. It’s genuinely one of the best pumpkin pie recipes I’ve ever tried, and I hope you love it as much as I do!
Why You’ll Love This Pumpkin Pie
The creamiest filling: This from-scratch pumpkin pie has a rich, smooth and creamy filling that sets beautifully without becoming overly firm or grainy.
Perfectly balanced spices: A combination of cinnamon, ginger, nutmeg, and cloves gives the filling that classic pumpkin pie flavor without overpowering the pumpkin (just like my pumpkin cake). It honestly tastes SO GOOD!
A buttery, flaky crust: The all-butter homemade crust is thoroughly blind-baked before adding the filling, giving you a beautifully crisp base that isn’t soggy.
Not overly sweet: The brown sugar and granulated sugar add just the right amount of sweetness while letting the pumpkin and warm spices shine.
Perfect for the holidays: Whether you’re making Thanksgiving dessert or baking for the holiday season, I promise this homemade pumpkin pie will be the ultimate crowd-pleaser!
My Top Tips for the Perfect Pumpkin Pie
Now, I don’t want you having to spend three years perfecting your pumpkin pie like I did! So I’ve put together my top tips below to help you get it just right on your very first try 🙂
1. Don’t skip blind baking the crust.
This is especially important for pumpkin pie because the filling is quite wet (compared to, say, an apple pie where you don’t need to pre-bake the crust). Blind baking the crust first helps make sure the bottom cooks through properly and doesn’t end up soggy. I also recommend using plenty of pie weights and pushing them right up against the sides of the crust to help prevent them from collapsing while baking.
2. Use pumpkin puree, not pumpkin pie filling.
Make sure you’re using 100% pure pumpkin puree rather than canned pumpkin pie filling, which already contains added sugar and spices. I use Libby’s 100% pure pumpkin puree for this recipe.
3. Don’t substitute the heavy cream.
The combination of evaporated milk and heavy cream is intentional! The extra fat from the heavy cream helps create a richer, creamier filling and reduces the risk of it splitting or cracking as it bakes. I wouldn’t recommend substituting all of the cream with evaporated milk.
4. Avoid over-whisking the filling.
Once you’ve added the dry ingredients, gently whisk everything together until just combined. You don’t want to incorporate too much air into the filling, as this can create little bubbles on the surface of your finished pumpkin pie.
5. Start baking at a higher temperature.
Place the pie into your 400°F (200°C) oven, then immediately reduce the temperature to 320°F (160°C). This gives the filling a little head start before it gradually bakes at a lower temperature, helping it set into a smooth, creamy texture while reducing the risk of overbaking and curdling.
6. Don’t overbake your pumpkin pie.
This is probably one of the most important things to get right! The edges should be set, but the center should still have approximately a 2-inch wobble when you gently move the pie. Don’t worry if the middle still looks a little soft, as the filling will continue to set as it cools. You don’t want to wait until the center is completely firm before taking it out of the oven.
7. Allow plenty of time for cooling.
Let the pie cool gradually in the turned-off oven with the door slightly ajar for 15 minutes. Then transfer it to a wire rack to cool completely. Once it’s at room temperature, allow at least 4 hours for the filling to fully set before slicing. I know it’s tempting to cut into it sooner, but trust me, it’s worth the wait! This will give you much cleaner slices and the perfect creamy texture.
How to Make Pumpkin Pie
You can find the full recipe, including the list of ingredients for this pumpkin pie recipe in the recipe card at the bottom of the post (for easy navigation, hit the ‘jump to recipe’ button at the top of the blog post). Here is just a quick visual breakdown of the recipe with step-by-step photos (recipe video is also provided in the recipe card below).
Pie Crust
Prepare the pie crust as per my pie crust recipe. The recipe makes two pie crusts, so you can either make the full recipe and save the second crust for later, or halve the recipe if you’re only making one pie. Chill in the fridge for at least 1 hour before using.
Once the dough is ready, preheat your oven to 400°F (200°C) conventional. Lightly flour your workbench and roll the dough out into a 12-inch circle. Wrap the dough around your rolling pin and gently unroll it over a 9-inch pie dish. Press the dough into the dish without stretching it, leaving some overhang around the edges.
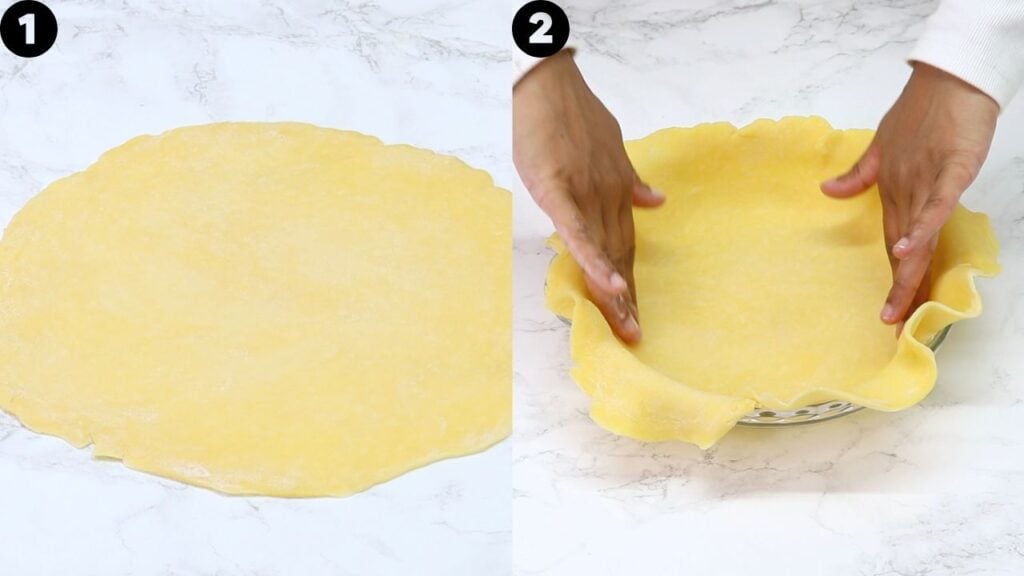
Roll the edges up and fold them underneath themselves to create a thick rim that sits just inside the pie dish. I like to flute the edges (this is optional). To do this, press your index finger from one hand on the inside of the crust, and pinch around it using your thumb and index finger from the other hand. Repeat around the whole pie (see video tutorial for demonstration). Make sure the finished edges don’t hang over the outside of the pie dish, otherwise they can fall off while baking.
Place a crinkled piece of parchment paper over the pie dough and fill with pie weights, pushing them right up against the sides and as high up the edges as possible. This helps prevent the crust from collapsing while baking.
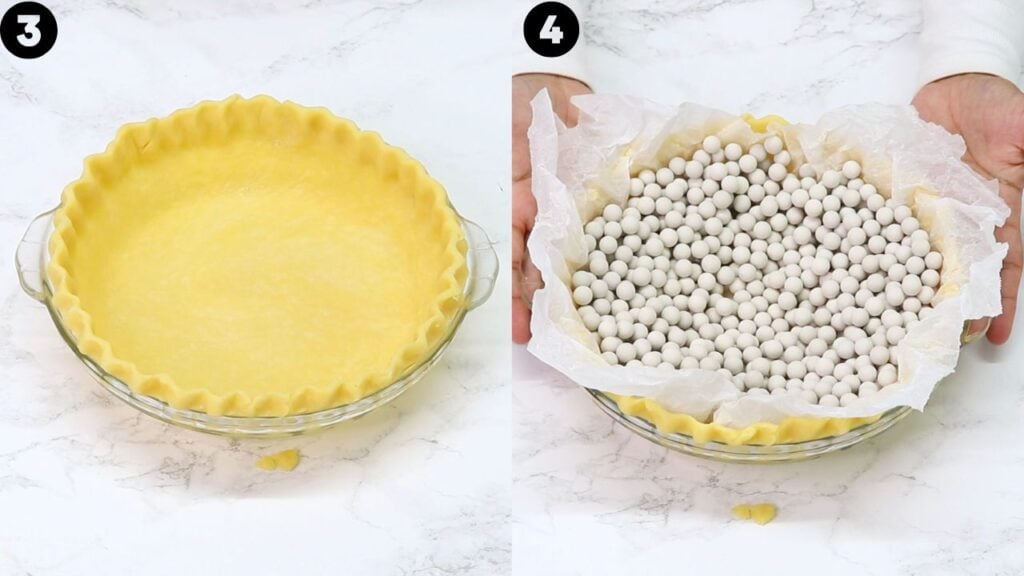
Blind bake the crust for 17 minutes (during this time, prepare the pumpkin pie filling as per the instructions below), then remove the parchment paper and pie weights. Prick the bottom and sides of the crust all over with a fork and bake for another 5–7 minutes, or until just lightly golden.
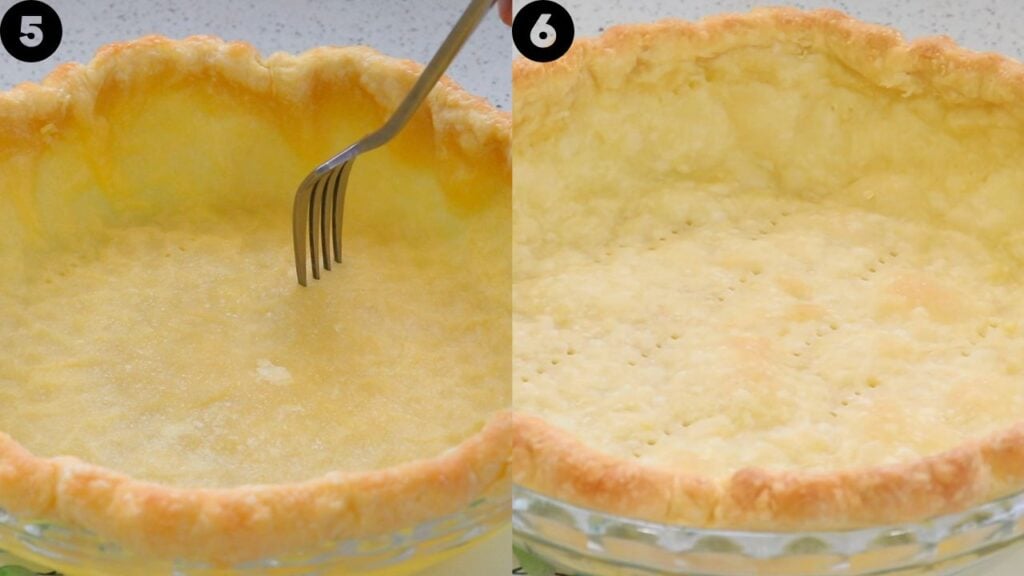
Pumpkin Pie Filling
While the crust is baking, prepare the filling so that it is ready to go straight into the hot pie crust.
In a medium bowl, sift together cornstarch, salt, ground cinnamon, ground ginger, ground nutmeg, and ground cloves. Set aside.
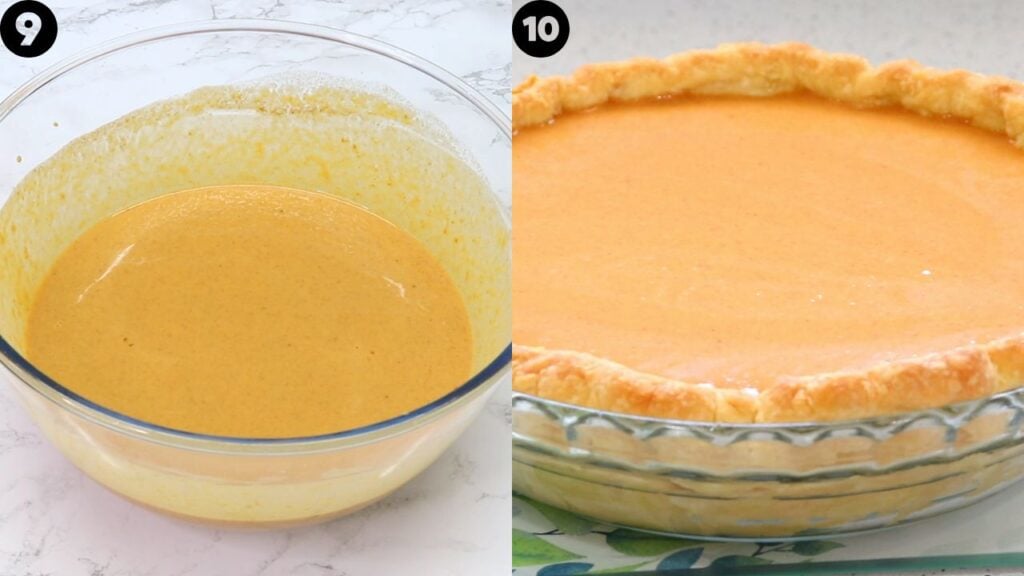
In a large bowl, whisk together pumpkin puree, evaporated milk, heavy cream, eggs, egg yolk, soft light brown sugar, white granulated sugar, and vanilla extract until smooth and combined.
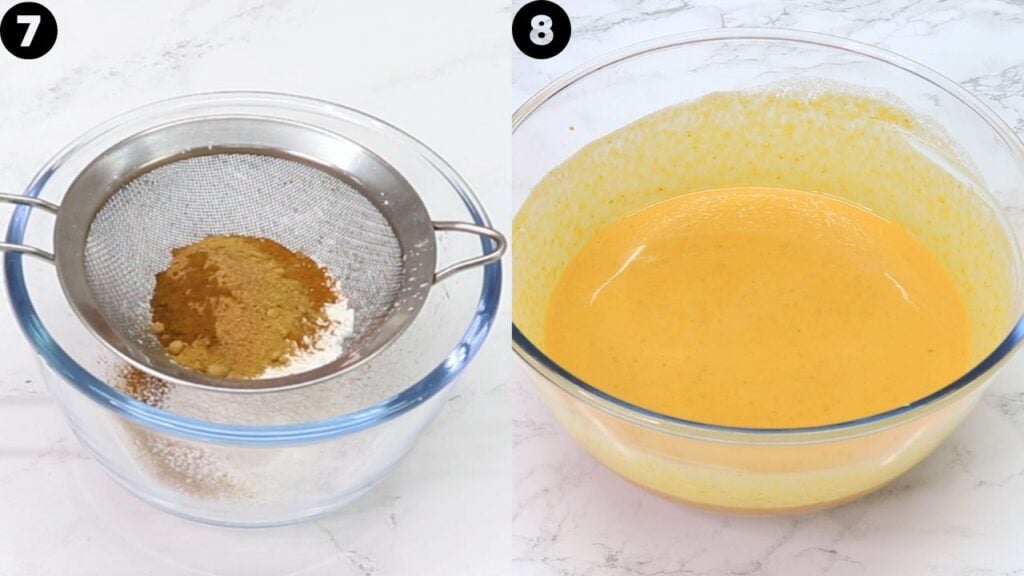
Add the sifted dry ingredients and gently whisk until just combined. Avoid over-whisking, as this can incorporate too much air into the filling.
Pour the filling straight into the hot, pre-baked pie crust. If there is any foam or froth on the surface, skim it off with a spoon or sieve if desired.
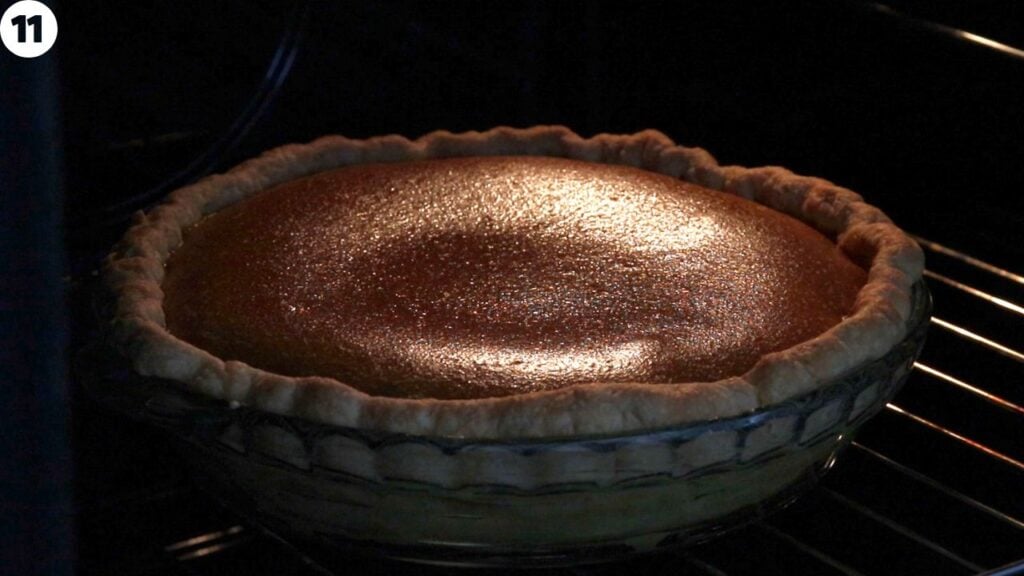
Place the pie straight back into the oven which should be at 400°F (200°C), then immediately reduce the temperature to 320°F (160°C) conventional (see note 2). Bake for 55–60 minutes, checking from the 50-minute mark. The edges should be set and slightly puffed, while the centre should still have approximately a 2-inch wobble when gently moved.
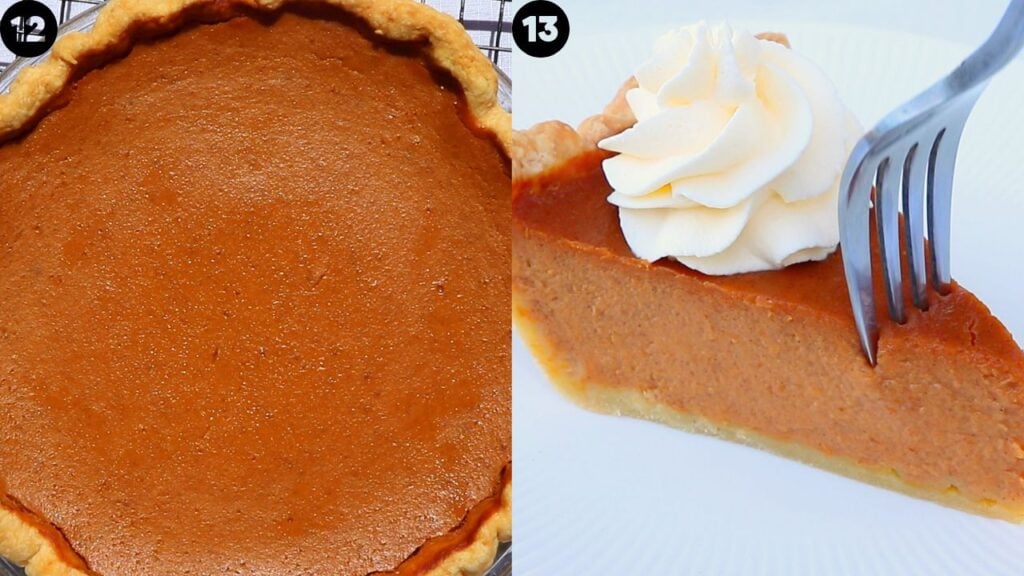
Once baked, turn off the oven and leave the pie inside with the door halfway open for 15 minutes. This allows it to cool gradually and helps prevent cracking.
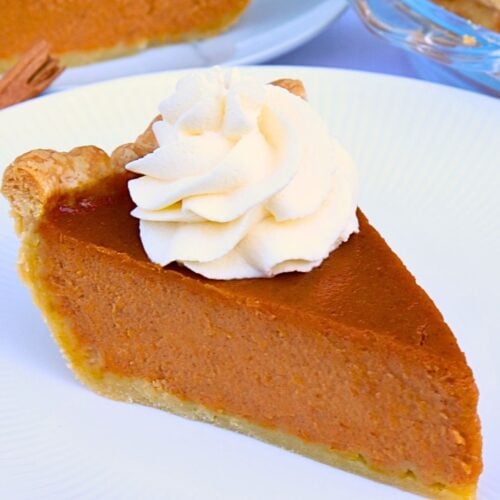
Remove the pie from the oven and place on a wire rack to cool completely. Allow it to set for at least 4 hours before slicing. I LOVE serving my pumpkin pie with some freshly whipped cream on top. Enjoy!
How to Store Pumpkin Pie
Once completely cooled, cover the pumpkin pie loosely with plastic wrap or aluminum foil and store it in the refrigerator for up to a week. Pumpkin pie contains eggs and dairy, so it shouldn’t be left at room temperature for more than 2 hours. I recommend serving it chilled or allowing individual slices to sit at room temperature for a little while before serving.
Frequently Asked Questions
1. Why is my pumpkin pie filling not setting?
Pumpkin pie filling needs enough time to bake and cool before it fully sets. If your pie is still very liquid in the center and the edges haven’t begun to puff up, it may need a little longer in the oven. Keep in mind that the center should still have about a 2-inch wobble when you remove it, as it will continue to set as it cools. It’s also important to allow at least 4 hours of cooling time before slicing.
2. Why did my pumpkin pie crack?
Pumpkin pie can crack when the filling is overbaked or exposed to sudden temperature changes. The eggs in the filling continue to cook as the pie bakes, and too much heat can cause the filling to become overcooked and crack. Starting at a higher temperature before reducing the heat, avoiding overbaking, and allowing the pie to cool gradually in the oven all help reduce the risk of cracking. My best trick when this happens is to top any cracks with whipped cream! No one will ever know 🙂
3. Why is my pumpkin pie filling watery?
A watery filling can happen if the pie hasn’t baked long enough or hasn’t had enough time to cool and set. It can also happen if the pie is overbaked. Make sure you’re using pure pumpkin puree rather than pumpkin pie filling, and measure your ingredients accurately. The cornstarch in this recipe also helps stabilize the filling and gives it a better set.
4. Can I use fresh pumpkin puree instead of canned pumpkin?
I recommend using canned pumpkin puree for this recipe because it has a more consistent moisture content. Homemade pumpkin puree can vary quite a bit depending on the type of pumpkin and how much moisture it contains, which can affect the final texture of your pie. I haven’t tested this recipe with homemade pumpkin puree, so I can’t guarantee the same results.
5. Can I make pumpkin pie ahead of time?
Absolutely! Pumpkin pie is a great make-ahead dessert. You can bake it a day or two before serving and store it covered in the refrigerator. In fact, making it ahead gives the filling plenty of time to fully set, making it easier to slice when you’re ready to serve.
8. Can I use store-bought crust?
Yes! You can use a store-bought 9-inch pie crust if you prefer. However, I highly recommend making my homemade pie crust recipe. Just make sure you blind bake it before adding the pumpkin filling to help prevent a soggy bottom.
My Ultimate Pumpkin Pie Recipe (3 Years in the Making!)
Print PinIMPORTANT: For accuracy, I would recommend using the gram measurements provided, as those are the exact quantities I use. Cup measurements are given as estimates (based on US cup measurements) to make it easier for those who do not have a scale.
Ingredients
Pie Crust
- 1 pie crust - see note 1
Pumpkin Pie Filling
- 1½ tbsps (14 g) cornstarch
- 1¼ tsps ground cinnamon
- ¾ tsp ground ginger - powdered
- ¼ tsp ground nutmeg
- ⅛ tsp ground cloves
- ½ tsp salt
- 1¾ cups (425 g) pumpkin puree - equivalent to a 15oz can. I use Libby's 100% pure pumpkin.
- ¾ cup (190 g) evaporated milk
- ⅔ cup (160 g) heavy cream
- 2 large eggs
- 1 large egg yolk
- ½ cup (100 g) soft light brown sugar
- ¼ cup (50 g) white granulated sugar
- 1½ tsps vanilla extract/essence
Instructions
Pie Crust
- Prepare the pie crust as per my pie crust recipe. The recipe makes two pie crusts, so you can either make the full recipe and save the second crust for later, or halve the recipe if you're only making one pie. Chill in the fridge for at least 1 hour before using.
- Once the dough is ready, preheat your oven to 400°F (200°C) conventional (see note 2 if using a convection oven). Lightly flour your workbench and roll the dough out into a 12-inch circle. Wrap the dough around your rolling pin and gently unroll it over a 9-inch pie dish. Press the dough into the dish without stretching it, leaving some overhang around the edges.
- Roll the edges up and fold them underneath themselves to create a thick rim that sits just inside the pie dish. I like to flute the edges (this is optional). To do this, press your index finger from one hand on the inside of the crust, and pinch around it using your thumb and index finger from the other hand. Repeat around the whole pie (see video for demonstration). Make sure the finished edges don't hang over the outside of the pie dish, otherwise they can fall off while baking.
- Place a crinkled piece of parchment paper over the pie dough and fill with pie weights, pushing them right up against the sides and as high up the edges as possible. This helps prevent the crust from collapsing while baking.
- Blind bake the crust for 17 minutes (during this time, prepare the pumpkin pie filling as per the instructions below), then remove the parchment paper and pie weights. Prick the bottom and sides of the crust all over with a fork and bake for another 5–7 minutes, or until just lightly golden.
Pumpkin Pie Filling
- While the crust is baking, prepare the filling so that it is ready to go straight into the hot pie crust.
- In a medium bowl, sift together cornstarch, salt, ground cinnamon, ground ginger, ground nutmeg, and ground cloves. Set aside.
- In a large bowl, whisk together pumpkin puree, evaporated milk, heavy cream, eggs, egg yolk, soft light brown sugar, white granulated sugar, and vanilla extract until smooth and combined.
- Add the sifted dry ingredients and gently whisk until just combined. Avoid over-whisking, as this can incorporate too much air into the filling.
- Pour the filling straight into the hot, pre-baked pie crust. If there is any foam or froth on the surface, skim it off with a spoon or sieve if desired.
- Place the pie straight back into the oven which should be at 400°F (200°C), then immediately reduce the temperature to 320°F (160°C) conventional (see note 3). Bake for 55–60 minutes, checking from the 50-minute mark. The edges should be set and slightly puffed, while the centre should still have approximately a 2-inch wobble when gently moved.
- Once baked, turn off the oven and leave the pie inside with the door halfway open for 15 minutes. This allows it to cool gradually and helps prevent cracking.
- Remove the pie from the oven and place on a wire rack to cool completely. Allow it to set for at least 4 hours before slicing. I LOVE serving my pumpkin pie with some freshly whipped cream on top (see note 4 for easy recipe). Enjoy!
Notes
- 1 cup heavy cream (240g) - cold
- 1½ tbsps powdered sugar
- ½ tsp vanilla extract/essence
Nutrition
Nutritional information are estimates only as they are automatically calculated by a third party application. Actual values may differ based on brands and types of products used.