

If you’re looking for a showstopping dessert, this baklava cheesecake IS IT! From the creamy New York style cheesecake filling, spiced nuts and crunchy filo pastry, this is the most decadent, elegant dessert you will have! Perfect for any festive occasion (including Eid!).

What is a Baklava Cheesecake?
A baklava cheesecake is basically a marriage between baklava and cheesecake, and let me tell you, IT IS INCREDIBLE!
Layers of filo pastry and crushed nuts are place on the bottom of a springform cake tin. It’s then topped with a creamy New York style cheesecake and baked until golden brown. It’s then finished off with a cinnamon infused syrup – YUM!
How to Make Baklava Cheesecake
The process of making this cheesecake can seem a little daunting, but I promise it’s not that difficult! It’s just made up of many small steps, and once you get a hang of layering the filo pastry, it comes together quite easily 🙂
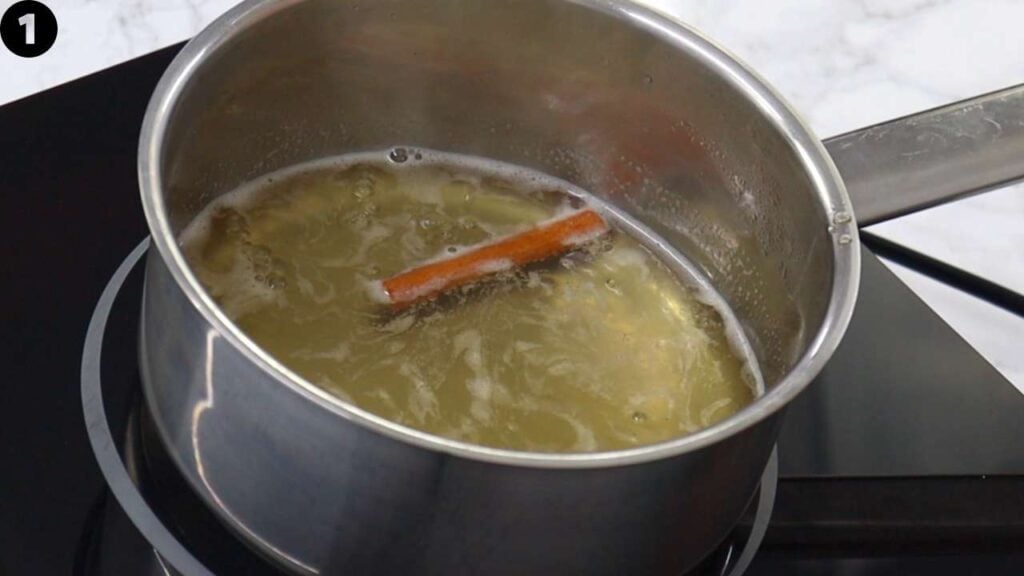
Begin with making your sugar syrup. Place a small saucepan over a medium heat and add in the water, sugar, honey, lemon juice and cinnamon stick. Bring to a simmer and let it simmer for 5 minutes. Set aside with the cinnamon stick still in the syrup so that it continues to infuse.
Next we move onto the cheesecake itself.
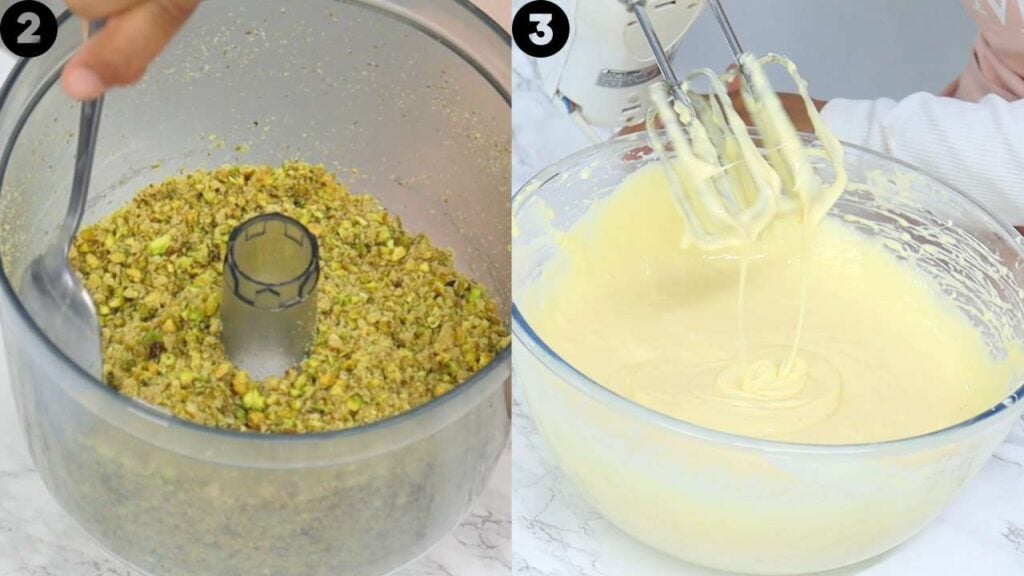
First prepare your nuts. In a food processor add in your pistachios and walnuts and pulse until crushed, but you still have little chunks. You don’t want the nuts to be too fine as you want some ‘crunch’ in your cheesecake. See video for visual demonstration.
Measure out 1/2 cup (60g) of the crushed nuts and set aside for decorating at the end. To the remaining nuts, add in cinnamon powder and 1 tsp of white sugar. Mix and set aside.
At this stage, preheat your oven to 140°C (284°F), with the fan on (see note 1 on recipe card below if you don’t have a fan function).
In a large bowl add in your cream cheese and mix with a hand or stand mixer on a medium speed until smooth (should take no more than 1 minute). Next add in the all purpose flour and mix until just combined. Do not overmix. Next add in the white sugar (1 cup), sour cream, vanilla, lemon juice and salt. Mix until just combined (see note 2 on recipe card below). Next add in the eggs one at a time, and mix only until each egg is just combined. This should take no more than 10 seconds between each egg. Once done set the cheesecake filling aside.
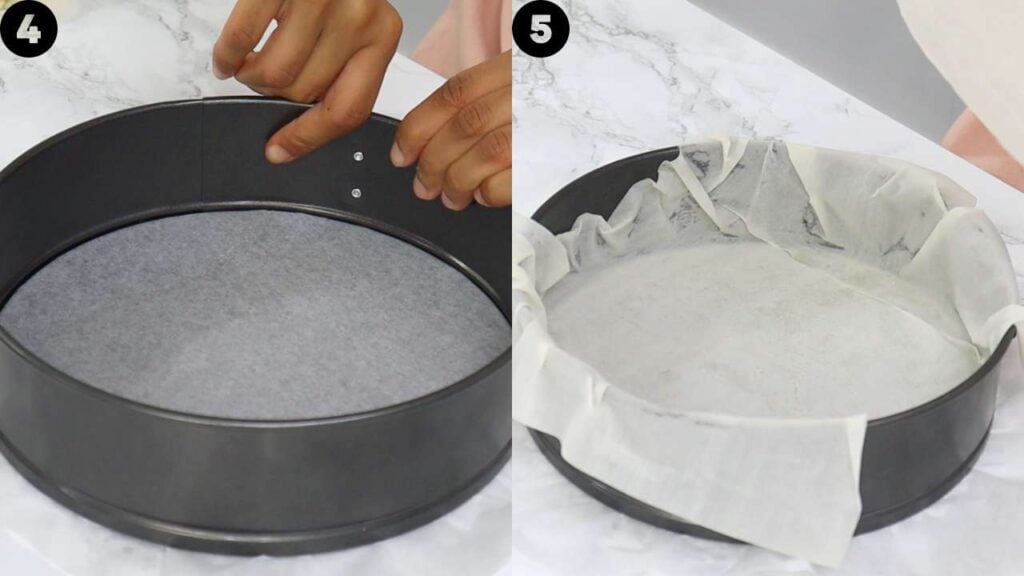
Line the bottom of a 23cm (9inch) springform cake tin with baking paper so only the base is covered (see video demonstration below on how to do this).
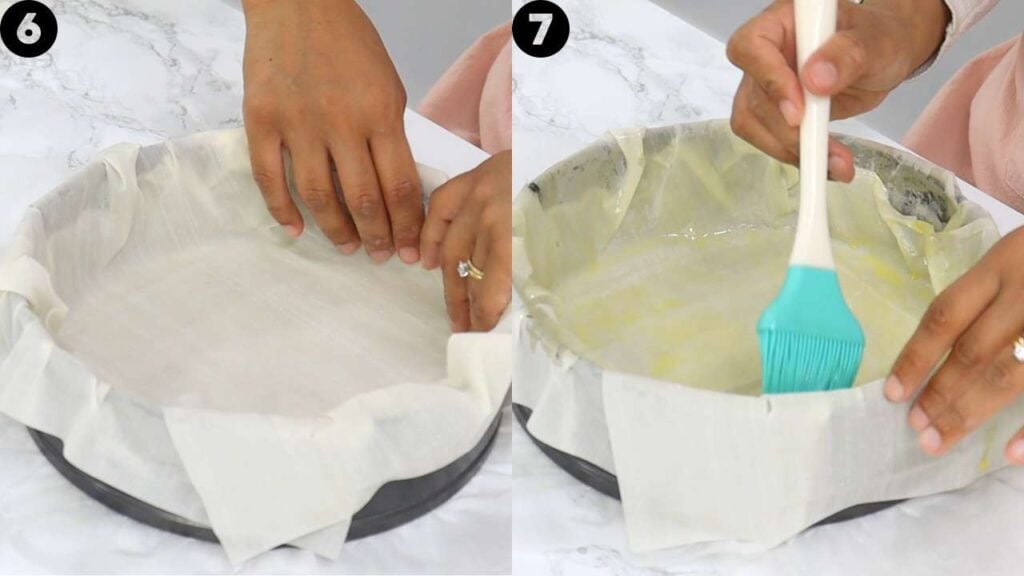
Using a pastry brush, coat the bottom and sides with melted butter.
Place a sheet of filo pastry in the cake tin (with some hanging over the edge). Then place another sheet of filo in the opposite direction so that the entire cake tin is covered and none of it is exposed.
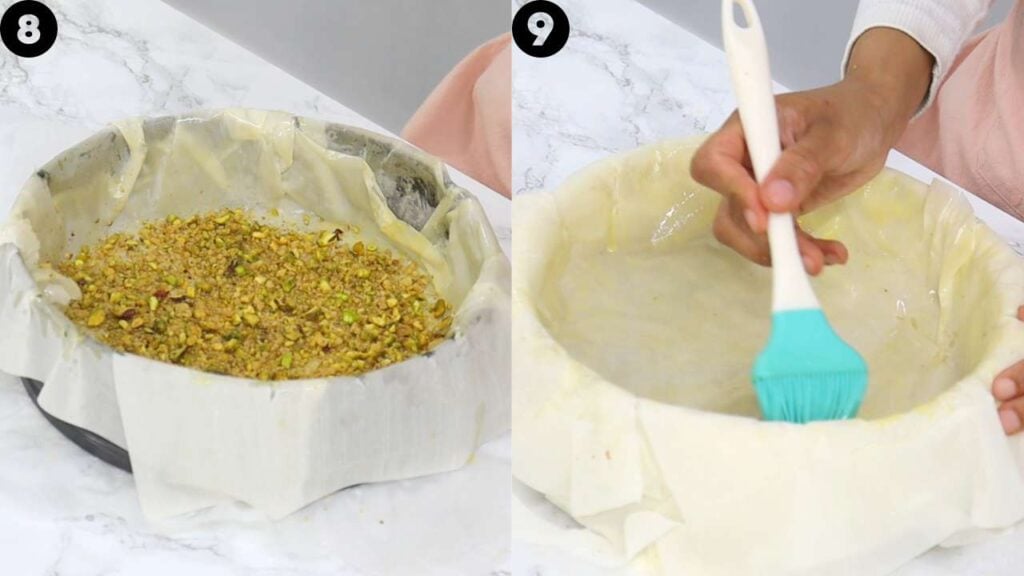
Coat the filo pastry in melted butter (make sure to get the sides as well), and place a thin layer of the crushed nuts (that we mixed the cinnamon and sugar in from earlier) evenly onto the filo. Then repeat the same steps. So 2 layers of filo pastry, brush with melted butter and then place a thin layer of crushed nuts. Again, 2 layers of filo pastry, brush with butter and then a thin layer of crushed nuts. One last time, 2 layers of filo pastry, brush with melted butter and then spread out a thin layer of the remaining nuts. This is what the order should be:
1) 2 layers of filo, butter, crushed nuts
2) 2 layers of filo, butter, crushed nuts
3) 2 layers of filo, butter, crushed nuts
4) 2 layers of filo, butter, crushed nuts
Once done, place two more sheets of filo pastry on top and brush with the melted butter. So in total you should have used 10 sheets of filo.
Pour your cheesecake batter into the cake tin. Using some scissors, cut the excess filo around the edges of the cake tin off. I also like to brush extra butter around the top edges of filo pastry.
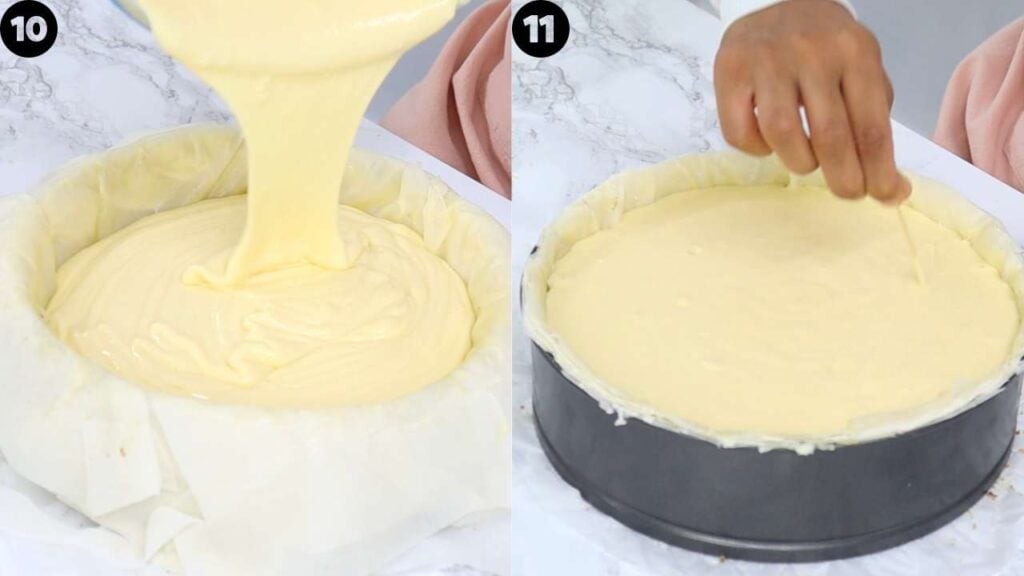
Drop your cake tin lightly onto your countertop to remove any large air bubbles. I also like to run a toothpick through the cheesecake batter.
Place your cheesecake into the oven for 1 hour. At the 1 hour mark, carefully remove the sides of the springform pan, turn up the temperature to 160°C (320°F) (see note 3 on recipe card below if you don’t have a fan function), and bake for a further 30 minutes, or until the filo pasty has a light golden colour. Check the cheesecake every 15 minutes to make sure it’s not overbrowning.
Once done, turn off the over and let the cheesecake cool in the oven with the oven door slightly open for 20 minutes. While cooling, reheat your sugar syrup from earlier and discard the cinnamon stick.
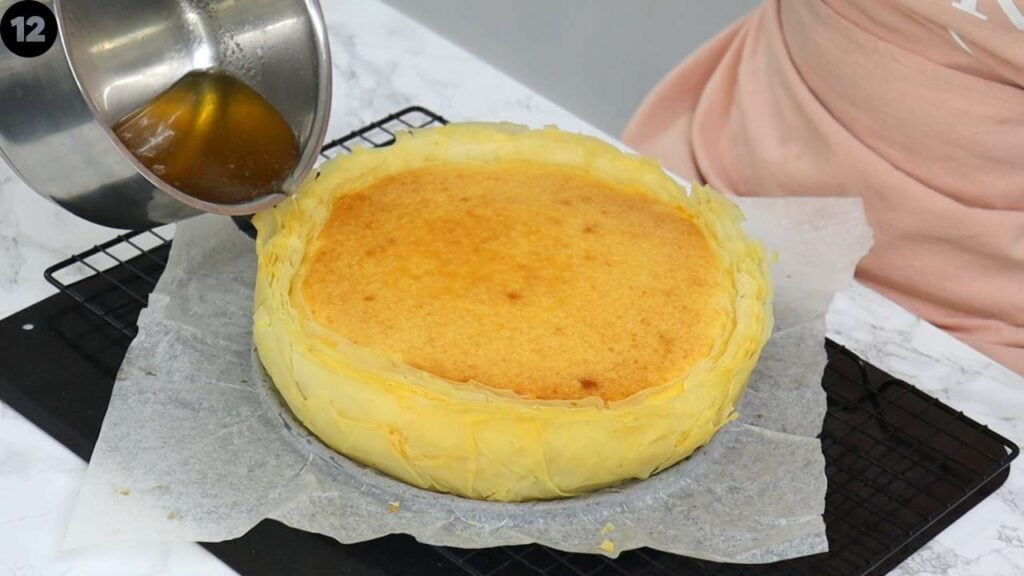
Place a tray under the cheesecake and pour the hot syrup onto the filo pastry around the edges of the cheesecake. It’s okay if some it gets onto the top of the cheesecake but try and get most of it onto the filo pastry. I also like to use a pastry brush and brush the sides of the cheesecake to make sure all the filo is coated in the syrup.
Decorate the top with the 1/2 cup of crushed nuts we set aside from earlier and the dried edible roses.
Allow the cheesecake to cool at room temperature for 2 hours, and then place it in the fridge for a minimum of 4 hours before serving (best to leave overnight).


Decadent Baklava Cheesecake
Print Pin VideoIMPORTANT: For accuracy, I would recommend using the gram measurements provided, as those are the exact quantities I use. Cup measurements are given as estimates (based on US cup measurements) to make it easier for those who do not have a scale.
Ingredients
Syrup
- ½ cup (105 g) water
- ¼ cup (50 g) white granulated sugar
- ¼ cup (85 g) honey - I use the liquid type
- 1½ tbsp fresh lemon juice
- 1 cinnamon stick
Cheesecake
- 1½ cups (180 g) pistachios
- 1¾ cups (175 g) walnuts
- 1 tsp cinnamon powder
- 1 tsp white granulated sugar - to mix with the crushed nuts
- 3¼ cups (750 g) cream cheese - room temperature
- 2½ tbsp flour - regular, all purpose
- 1 cup (200 g) white granulated sugar - for cheesecake filling
- ¾ cup (180 g) sour cream - room temperature
- 2 tsp vanilla essence/extract
- 1½ tsp fresh lemon juice
- ¼ tsp salt
- 3 large eggs - room temperature
- 10 sheets filo pastry
- ¼ cup (55 g) unsalted butter - melted
- 2 tbsp dried edible roses - optional
Instructions
- Before you begin all ingredients must be at room temperature.
Syrup
- Place a small saucepan over a medium heat and add in the water, sugar, honey, lemon juice and cinnamon stick. Bring to a simmer and let it simmer for 5 minutes. Set aside with the cinnamon stick still in the syrup so that it continues to infuse.
Cheesecake
- First prepare your nuts. In a food processor add in your pistachios and walnuts and pulse until crushed, but you still have little chunks. You don't want the nuts to be too fine as you want some 'crunch' in your cheesecake. See video for visual demonstration.
- Measure out 1/2 cup (60g) of the crushed nuts and set aside for decorating at the end. To the remaining nuts, add in the cinnamon powder and 1 tsp of white sugar. Mix and set aside.
- At this stage, preheat your oven to 140°C (284°F), with the fan on (see note 1 if you don't have a fan function).
- In a large bowl add in your cream cheese and mix with a hand or stand mixer on a medium speed until smooth (should take no more than 1 minute).
- Next add in the all purpose flour and mix until just combined. Do not overmix.
- Next add in the white sugar (1 cup), sour cream, vanilla, lemon juice and salt. Mix until just combined (see note 2).
- Next add in the eggs one at a time, and mix only until each egg is just combined. This should take no more than 10 seconds between each egg. Once done set the cheesecake filling aside.
- Line the bottom of a 23cm (9inch) springform cake tin with baking paper so only the base is covered (see video demonstration on how to do this).
- Using a pastry brush, coat the bottom and sides with melted butter.
- Place a sheet of filo pastry in the cake tin (with some hanging over the edge). Then place another sheet of filo in the opposite direction so that the entire cake tin is covered and none of it is exposed.
- Coat the filo pastry in melted butter (make sure to get the sides as well), and place a thin layer of the crushed nuts (that we mixed the cinnamon and sugar in from earlier) evenly onto the filo. Then repeat the same steps. So 2 layers of filo pastry, brush with melted butter and then place a thin layer of crushed nuts. Again, 2 layers of filo pastry, brush with butter and then a thin layer of crushed nuts. One last time, 2 layers of filo pastry, brush with melted butter and then spread out a thin layer of the remaining nuts. This is what the order should be: 1) 2 layers of filo, butter, crushed nuts2) 2 layers of filo, butter, crushed nuts3) 2 layers of filo, butter, crushed nuts4) 2 layers of filo, butter, crushed nuts
- Once done, place two more sheets of filo pastry on top and brush with the melted butter. So in total you should have used 10 sheets of filo.
- Pour your cheesecake batter into the cake tin. Using some scissors, cut the excess filo around the edges of the cake tin off. I also like to brush extra butter around the top edges of filo pastry.
- Drop your cake tin lightly onto your countertop to remove any large air bubbles. I also like to run a toothpick through the cheesecake batter.
- Place your cheesecake into the oven for 1 hour. At the 1 hour mark, carefully remove the sides of the springform pan, turn up the temperature to 160°C (320°F) (see note 3 if you don't have a fan function), and bake for a further 30 minutes, or until the filo pasty has a light golden colour. Check the cheesecake every 15 minutes to make sure it's not overbrowning.
- Once done, turn off the over and let the cheesecake cool in the oven with the oven door slightly open for 20 minutes. While cooling, reheat your sugar syrup from earlier and discard the cinnamon stick.
- Place a tray under the cheesecake and pour the hot syrup onto the filo pastry around the edges of the cheesecake. It's okay if some it gets onto the top of the cheesecake but try and get most of it onto the filo pastry. I also like to use a pastry brush and brush the sides of the cheesecake to make sure all the filo is coated in the syrup.
- Decorate the top with the 1/2 cup of crushed nuts we set aside from earlier and the dried edible roses.
- Allow the cheesecake to cool at room temperature for 2 hours, and then place it in the fridge for a minimum of 4 hours before serving (best to leave overnight).
Video

Notes
Nutrition
Nutritional information are estimates only as they are automatically calculated by a third party application. Actual values may differ based on brands and types of products used.










26 Comments
Hi MK, my cheesecake split and cracked 😪 What am I doing wrong? Tastes delicious but I can’t figure out if I over baked it or what… any idea why it would crack so badly? I had it at 140 for an hour, then 160 for 12 mins or so… my oven does tend to run hot. As soon as I removed the outer cake tin to add colour to the baklava sheets, it split…
Hi Sobes! 🙂 Ohh noo I am so sorry to hear your cheesecake split – that can be frustrating! It sounds like the cheesecake is overbaking, which is what can cause it to crack. I would recommend reducing the oven temp slightly, baking for an hr and then removing the outer ring before increasing the baking temp for the final bake. Overmixing the initial cheesecake mixture can also cause the cheesecake to crack due to too much air in the batter, so also just keep that in mind incase the cheesecake batter is being overmixed 🙂
Hope this helps for next time!
Hello! I had two questions as I hope to make this cake for Eid.
1 – I see two temperatures listed to bake this cake for if you don’t have a fan inside oven (assuming you mean convection?). What temperature to go by?
2 – is there a suggestion you have to make the exterior baklava sheets looking darker? Should I pre bake? Or remove the cake shape after baking to give edges more color?
Hi there! 🙂 If using a conventional oven (no fan) then bake at the higher temp (155°C or 310°F). When it comes to browning the filo pastry, yes pre-baking slightly before adding in the cheesecake filling is a great idea! I’ve actually been meaning to update this recipe to suggest that 😀
Hope you enjoy the recipe 🙂
Hi MK, this is another masterpiece. I always get excited to get notifications of all your new cakes. And it was time to try this one. It was fantastic; your instructions and tips allowed me to do this well. It was delicious!!! I wish we could upload pictures of us making your cakes :). My 15-year-old said this is my best cheesecake ever. I am no professional baker but I have been making cheesecakes for years! Thank you again for sharing your talent with us…
Aww I am so so happy to hear you loved the cake Shorna, and I am honoured by your daughters comment about this being your best cheesecake! 😀 Really appreciate all the love and support 🙂
Hi MK, thank you for another fantastic recipe… my family really enjoyed this cheesecake!! My 15year old said it was the best cheesecake she has had! Thank you so much for sharing your talent and knowledge with us!!! I’ll keep making your recipes.
Hi Shorna! So so happy to hear you’ve been enjoying the recipes and that your daughter loved the cake 😀
Fail proof and delicious!
So happy to hear you enjoyed the recipe Hayat! 😀
Wow! This was sooo good! I cheated a little and made less layers of the baklava. But I can’t believe that it remained crispy on the bottom and silky cheesecake on top! Great recipe. Thank you so much!
Awesome! So so happy you enjoyed it Eman 😀
Slmz MK, I am down with the flu on Eid Day, I stmble over your website. I told my daughter I would not making anything as I am not well and whatever I am going to make its not going to come right as I have no energy and are way too dizzy to stand on my feet. I will definitely put this on my list as I surprise cake. My daughter and I love cheese cake. The once in the shops taste so synthetic.
Wassalaam Masnoena! Hope you feel better soon and hope you and your daughter enjoy the cake once you find the energy to make it 😀
Delicious!
Hello
Is there an alternative I can use for the sour cream as it’s not available where I am?
Many thanks
Hi Nichola! 🙂 I haven’t tried another substitute myself so can’t say for sure but I think cream may work well (whipping or heavy cream) 🙂
Nichola, Yogurt should be a good replacement for sour cream.
What a wonderful and grand idea to put your (and my) two favourites desserts into one beautiful package. Oh this this one of those mouthwatering things which we can look forward to. Yipeeee!!!
Haha it is a pretty special one! Hope you enjoy it Marja 🙂