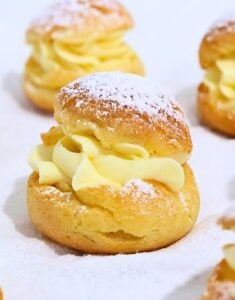
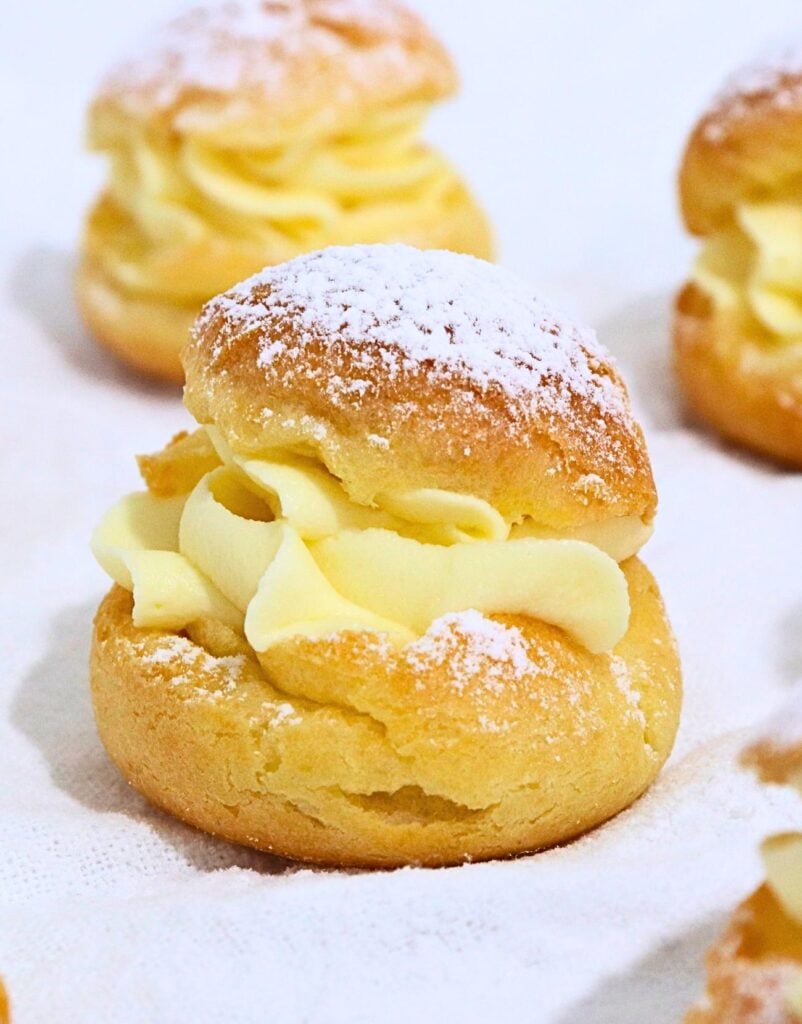
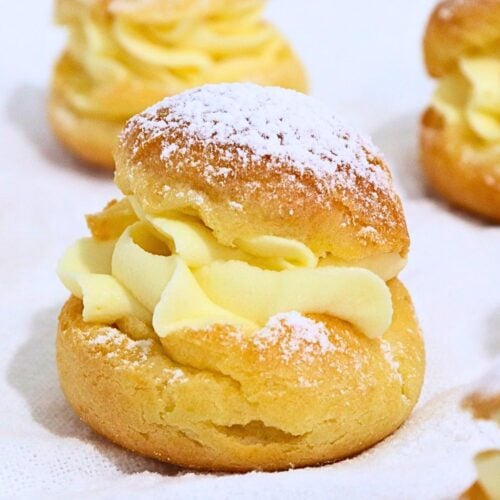
This cream puffs recipe makes light, crisp pastry shells, filled with a rich, fluffy cream filling. They’re surprisingly simple to make, look beautifully impressive, and taste just like they came from a bakery!
Why You’ll Love This Cream Puffs Recipe
There’s something so special about homemade cream puffs, and after plenty of testing, I finally landed on a version that gives you beautifully crisp pastry shells with a light, airy interior (that isn’t dry) and the most delicious creamy filling. This cream puffs recipe may look impressive, but it’s actually much simpler than you’d think to make at home. Here’s why you’ll love it:
Light and crisp pastry shells – the choux pastry bakes up beautifully golden with a crisp exterior and a soft, hollow centre that’s perfect for filling.
A rich and fluffy cream filling – for the cream puff filling, I decided to use my 5-star rated stabilized mascarpone whipped cream filling. It’s smooth, creamy, and holds its shape beautifully inside the pastry shells.
Bakery-style results at home – these cream puffs look elegant and impressive, but they’re made with simple ingredients and techniques you can easily master.
Great for special occasions – whether you’re making them for afternoon tea, birthdays, holidays, or simply as a weekend treat, these cream puffs are always a crowd-pleaser.
Tips and Tricks for Perfect Cream Puffs
After plenty of testing and a few failed batches (okay… more than just a few!), I finally perfected this cream puff recipe. Below, I’m sharing all the key tips and lessons I learned along the way so you can confidently make it successfully the first time.
Cook the dough properly – The first stage of making choux pastry (pâte à choux) is important. Make sure you cook the dough until it pulls away from the sides of the saucepan and leaves a thin film on the bottom. However, be careful not to overcook it, as this can cause the butter to separate and affect the final texture. If you notice the dough becoming shiny, take it off the heat.
Add the eggs gradually – One of the biggest tips for successful cream puffs is not adding all the eggs at once. Depending on factors like humidity and how much the dough was cooked, you may need slightly more or less egg. Add it slowly and stop once the dough reaches the correct consistency.
Look for the V-shape test – The finished choux pastry dough should be smooth and glossy and slowly fall from a spatula in a thick V shape. If the dough is too stiff, the cream puffs may not rise properly. If it is too loose, they may spread too much.
Pipe the dough evenly – Try to pipe each cream puff the same size so they bake evenly. Making them slightly taller rather than wider will help encourage a better rise.
Smooth the tops before baking – Any peaks left on top of the dough can become uneven or burn during baking. Gently smoothing them with a damp finger helps create beautifully rounded cream puffs.
Do not open the oven door while baking – The steam inside the oven is what helps the choux pastry rise. Opening the oven door too early can cause the cream puffs to collapse.
Allow them to dry out in the oven – Leaving the cream puffs in the turned-off oven with the door slightly open helps remove excess moisture and reduces the chance of them deflating.
Fill them close to serving – For the crispiest texture, it’s best to fill the cream puffs as close to serving time as possible, as the filling will gradually soften the pastry shells.
How to Make This Cream Puffs Recipe
You can find the full list of ingredients for this cream puffs recipe in the recipe card at the end of the blog post (for easy navigation, hit the ‘jump to recipe’ button at the top of the blog post). Here is just a quick visual breakdown of the recipe (recipe video is also provided in the recipe card below).
Cream Puff Shells (Choux Pastry)
Preheat the oven to 375℉ (190℃) conventional. Line 2 baking sheets with parchment paper and set aside.
In a medium saucepan, combine the water, milk, butter, sugar, and salt. Place over medium heat, stirring occasionally until the butter has fully melted and the mixture just comes to a boil.
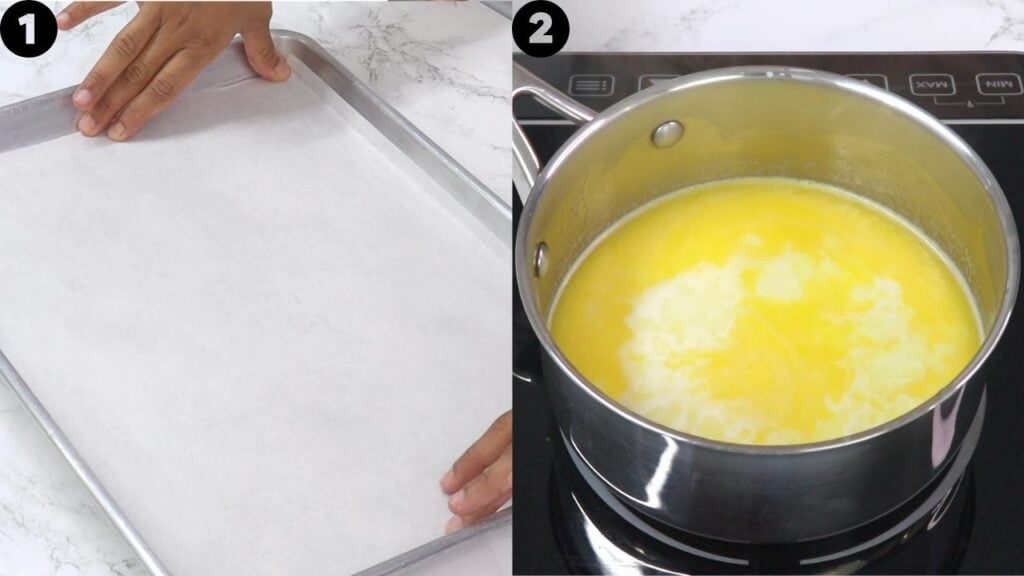
Remove the saucepan from the heat and immediately add the flour all at once. Using a spatula or wooden spoon, stir vigorously until a smooth dough forms and no dry flour remains.
Return the saucepan to low-medium heat and cook, stirring constantly (but gently), for 1–2 minutes, or until the dough forms a ball, pulls away from the sides of the pan, and a thin film forms on the bottom of the pan. Avoid overcooking the dough, as this can cause the butter to separate.
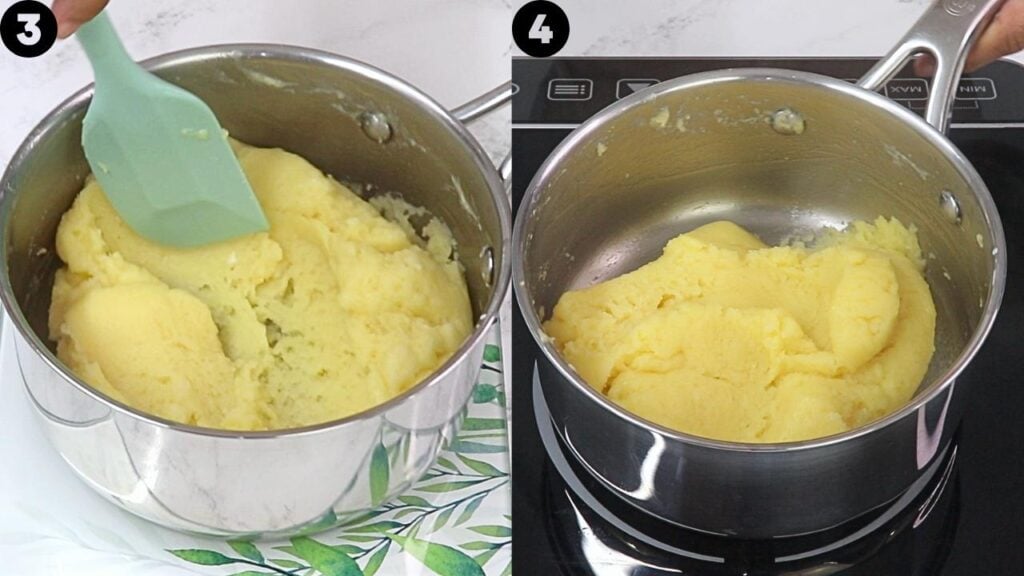
Transfer the dough to a large mixing bowl and add the vanilla. Using a hand mixer or stand mixer fitted with the paddle attachment, mix on a low speed for about 1 minute to cool the dough slightly. The dough should feel warm, but not hot. If necessary, allow it to cool for a few more minutes before adding the eggs.
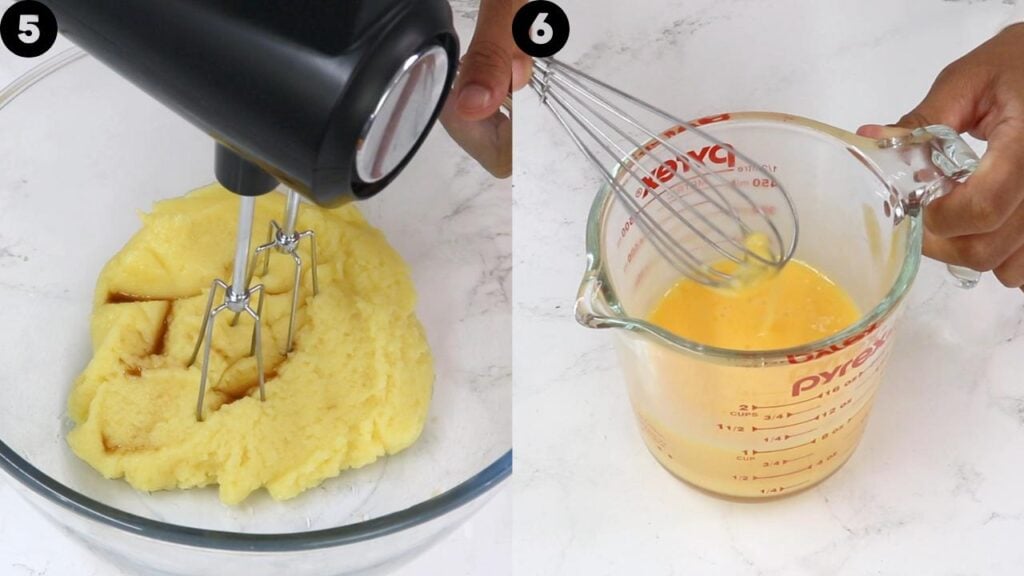
In a separate bowl, whisk the eggs until well combined. With the mixer on a low speed, add about one-quarter of the egg mixture to the dough and mix until fully incorporated. Add another quarter and mix again. Continue adding the remaining egg mixture a little at a time, mixing well after each addition and checking the consistency as you go. Depending on factors such as humidity and how much the dough was cooked, you may not need all of the egg mixture. The dough is ready when it is smooth and glossy and slowly falls from a spatula in a thick V-shaped ribbon. It should hold its shape while still having a little movement.
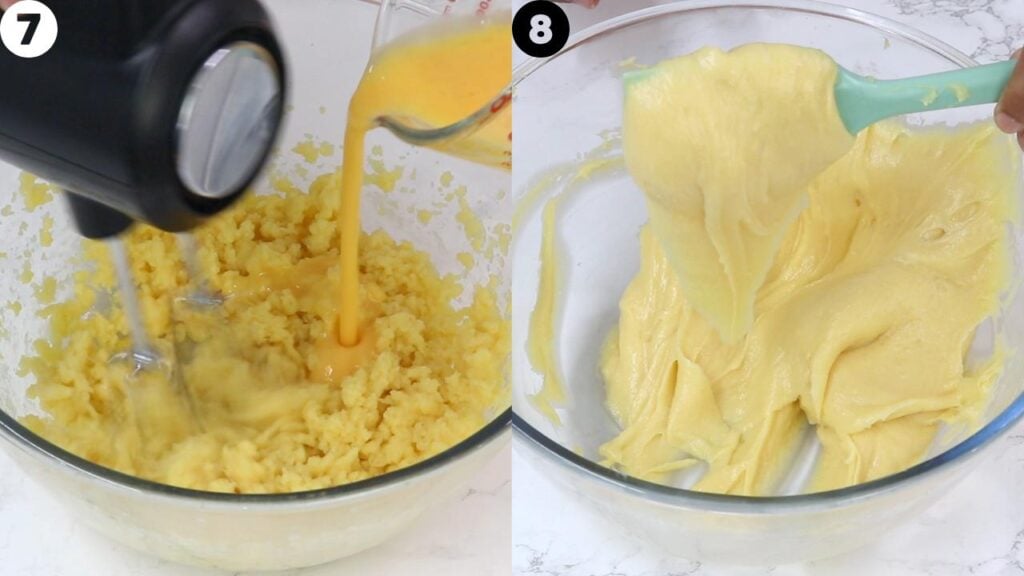
Transfer the dough to a pastry bag fitted with a large round piping tip (I used a 1A round tip). Pipe 2-inch (5 cm) rounds onto the prepared baking trays, leaving enough space between each one for them to expand. Shape them slightly taller rather than wider to encourage a nice rise.
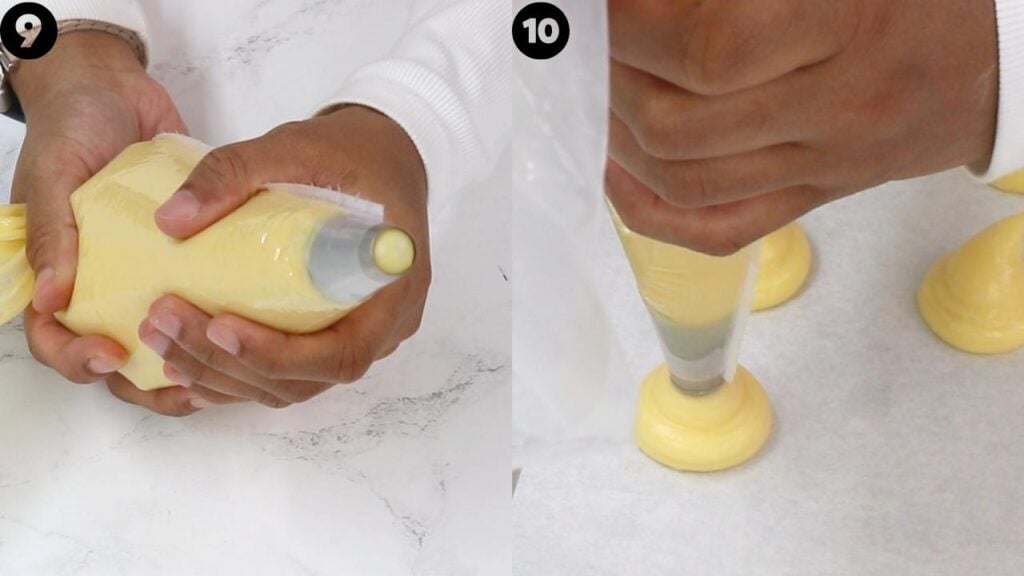
Dip your finger into a little water and with your wet finger, gently smooth down any peaks on top of the choux dough. Lightly dust the tops with powdered sugar.
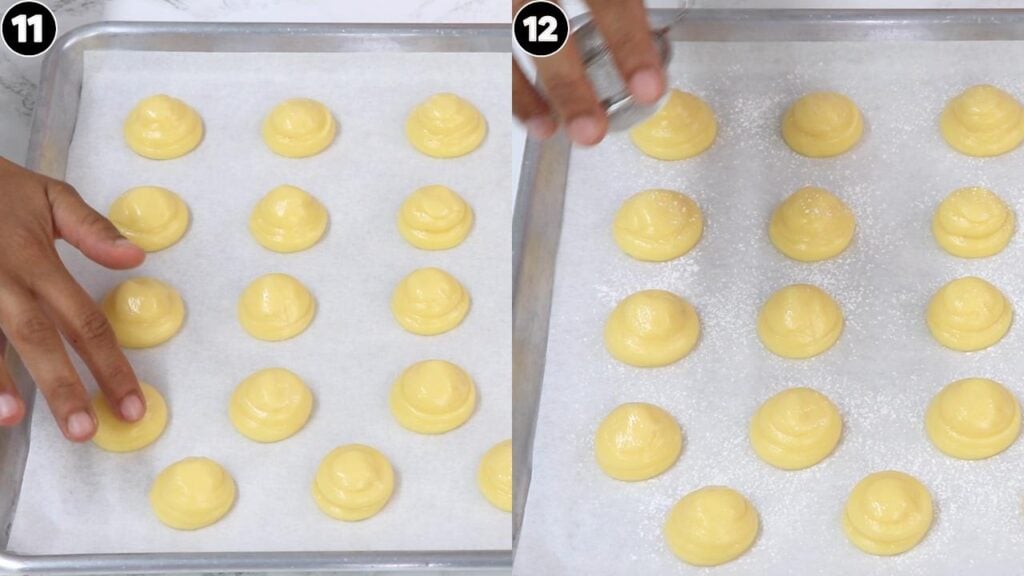
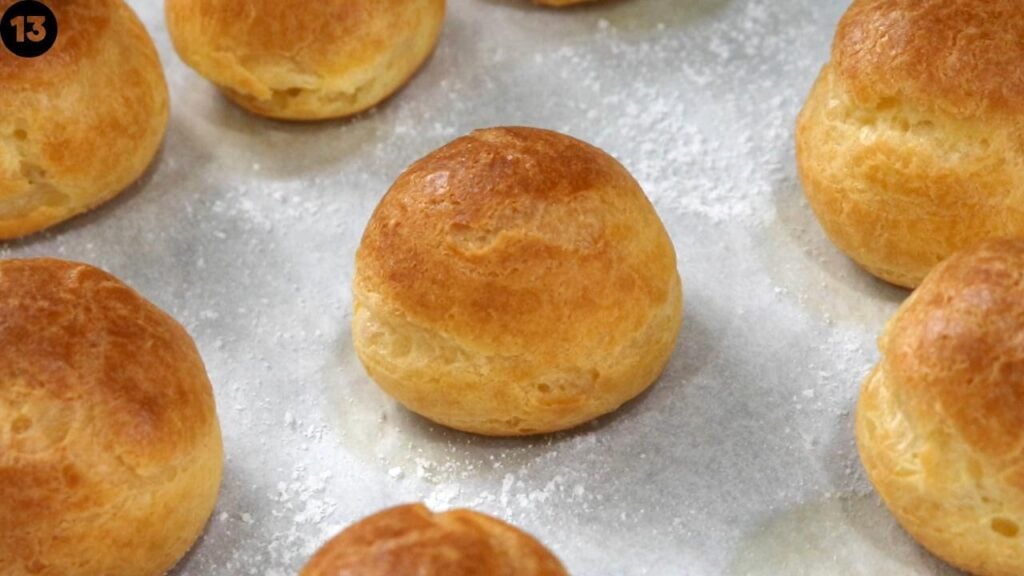
Bake one tray at a time on the lower third rack of the oven for 30–35 minutes, or until the cream puffs are deep golden brown, feel light in weight, and sound hollow when tapped.
Turn the oven off, crack the oven door open slightly, and leave the cream puffs inside for 10 minutes. Transfer them to a wire rack to cool completely. Turn the oven back on, wait until it is preheated and repeat the baking process with the remaining tray.
Stabilized Whipped Cream Filling
To prepare the filling, combine the mascarpone, powdered sugar, and vanilla extract in a large bowl. Using a hand mixer or stand mixer, mix on a low speed for about 10 seconds, then increase to medium-high speed and mix until smooth.
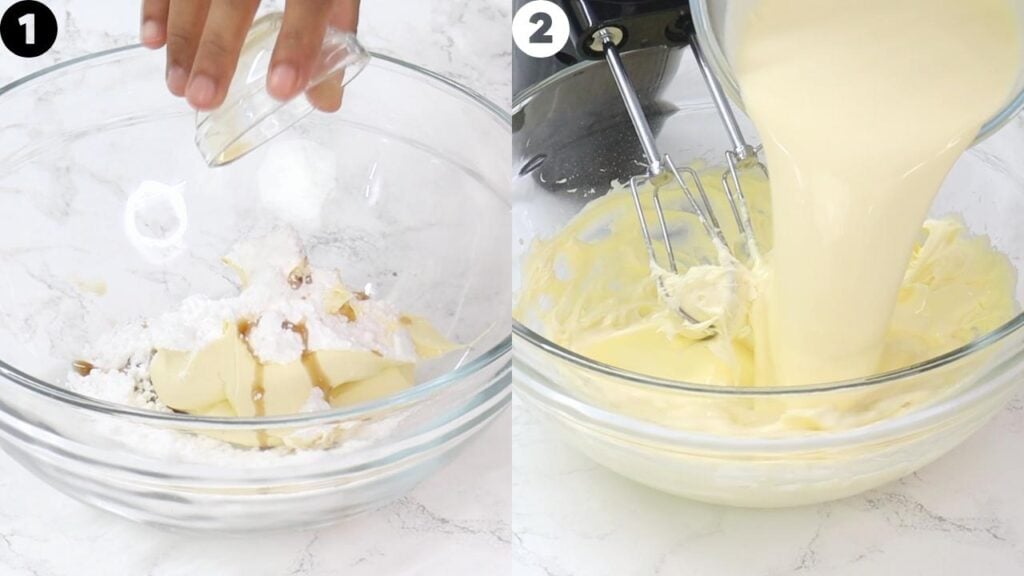
Add the cold whipping cream and mix on a low speed for about 10 seconds. Increase to medium-high speed and whip until stiff peaks form. Be careful not to overwhip the cream.
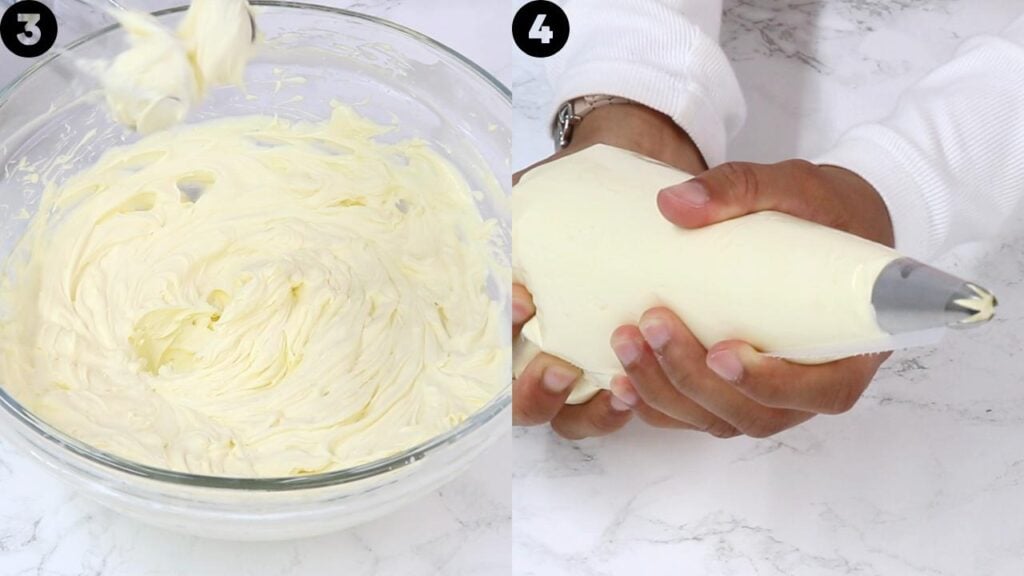
Transfer the filling to a piping bag fitted with a 1M star piping tip.
Assembly
To fill the cream puffs, you can use either of the following methods:
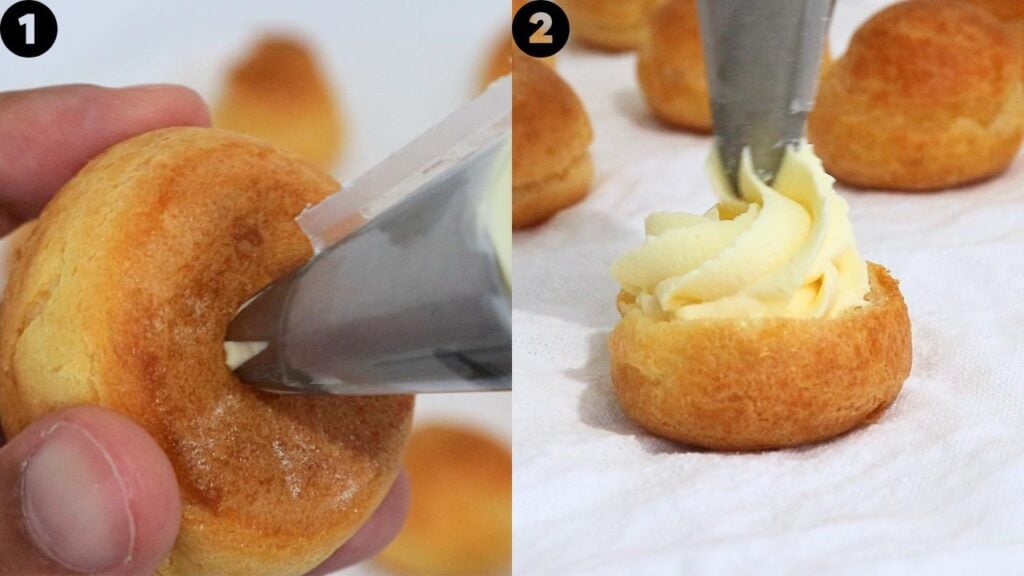
Method 1: Fill from the bottom. Insert the piping tip into the bottom of each cream puff and pipe in the filling until it feels full. Finish with a light dusting of powdered sugar.
Method 2: Open-style cream puffs. Using a serrated knife, carefully slice the tops off each cream puff. Pipe the filling onto the bottom of each puff in a swirling motion, making it slightly taller than the pastry shell. Gently place the tops back on and finish with a light dusting of powdered sugar.
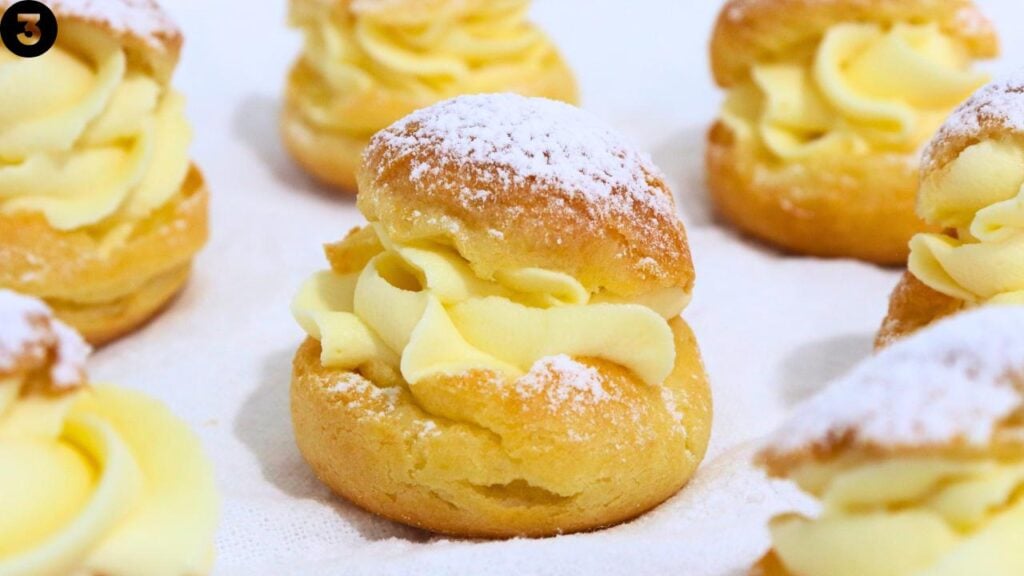
Cream puffs are best enjoyed as soon as possible. For the best texture, I recommend filling and serving them on the same day the pastry shells are made. Enjoy!
How to Store Cream Puffs
Unfilled cream puff shells:
Cream puff shells are best enjoyed on the day they are made, but they can be stored in an airtight container at room temperature for up to 1 day. If they lose some crispness, you can refresh them by placing them in a 180°C (350°F) oven for a few minutes, then allowing them to cool completely before filling.
Filled cream puffs:
Once filled, cream puffs should be stored in an airtight container in the refrigerator and are best enjoyed within 24 hours. Keep in mind that the pastry shells will soften over time as they absorb moisture from the filling.
Cream Puffs Recipe (Bakery-Style!)
Print Pin VideoIMPORTANT: For accuracy, I would recommend using the gram measurements provided, as those are the exact quantities I use. Cup measurements are given as estimates (based on US cup measurements) to make it easier for those who do not have a scale.
Ingredients
Cream Puff Shells (Choux Pastry)
- ¾ cup (180 g) water
- ¼ cup (60 g) whole milk
- ½ cup (113 g) unsalted butter
- 1 tbsp (13 g) white granulated sugar
- ½ tsp salt - omit if using salted butter
- 1 cup (120 g) all-purpose flour
- ½ tsp vanilla essence/extract
- 4 large eggs - room temperature
- powdered sugar - for dusting before baking
Stabilized Whipped Cream Filling
- 1 cup (225 g) mascarpone - cold
- ½ cup (55 g) powdered sugar - also known as icing/confectioners' sugar
- 1 tsp vanilla essence/extract
- 1½ cups (335 g) heavy cream - cold
Instructions
Cream Puff Shells (Choux Pastry)
- Preheat the oven to 375℉ (190℃) conventional (see note 1 if using a convection oven). Line 2 baking trays with parchment paper and set aside.
- In a medium saucepan, combine the water, milk, butter, sugar, and salt. Place over medium heat, stirring occasionally until the butter has fully melted and the mixture just comes to a boil.
- Remove the saucepan from the heat and immediately add the flour all at once. Using a spatula, stir vigorously until a smooth dough forms and no dry flour remains.
- Return the saucepan to low-medium heat and cook, stirring constantly (but gently), for 1–2 minutes, or until the dough forms a ball, pulls away from the sides of the pan, and leaves a thin film on the bottom of the saucepan. Avoid overcooking the dough, as this can cause the butter to separate.
- Transfer the dough to a large mixing bowl and add the vanilla. Using a hand mixer or stand mixer fitted with the paddle attachment, mix on a low speed for about 1 minute to cool the dough slightly. The dough should feel warm, but not hot. If necessary, allow it to cool for a few more minutes before adding the eggs.
- In a separate bowl, whisk the eggs until well combined. With the mixer on a low speed, add about one-quarter of the egg mixture to the dough and mix until fully incorporated. Add another quarter and mix again. Continue adding the remaining egg mixture a little at a time, mixing well after each addition and checking the consistency as you go. Depending on factors such as humidity and how much the dough was cooked, you may not need all of the egg mixture. The dough is ready when it is smooth and glossy and slowly falls from a spatula in a thick V-shaped ribbon. It should hold its shape while still having a little movement.
- Transfer the dough to a piping bag fitted with a large round piping tip (I used a 1A tip). Pipe 2-inch (5 cm) rounds onto the prepared baking trays, leaving enough space between each one for them to expand. Shape them slightly taller rather than wider to encourage a nice rise.
- Dip your finger into a little water and gently smooth down any peaks on top of the dough. Lightly dust the tops with powdered sugar.
- Bake one tray at a time on the lower third rack of the oven for 30–35 minutes, or until the cream puffs are deep golden brown, feel light in weight, and sound hollow when tapped.
- Turn the oven off, crack the oven door open slightly, and leave the cream puffs inside for 10 minutes. Transfer them to a wire rack to cool completely. Turn the oven back on, wait until it is preheated and repeat the baking process with the remaining tray.
Stabilized Whipped Cream Filling
- To prepare the filling, combine the mascarpone, powdered sugar, and vanilla extract in a large bowl. Using a hand mixer or stand mixer, mix on a low speed for about 10 seconds, then increase to medium-high speed and mix until smooth.
- Add the cold whipping cream and mix on a low speed for about 10 seconds. Increase to medium-high speed and whip until stiff peaks form. Be careful not to overwhip the cream.
- Transfer the filling to a piping bag fitted with a 1M star piping tip.
Assembly
- To fill the cream puffs, you can use either of the following methods:Method 1: Fill from the bottom. Insert the piping tip into the bottom of each cream puff and pipe in the filling until it feels full. Finish with a light dusting of powdered sugar.Method 2: Open-style cream puffs. Using a serrated knife, carefully slice the tops off each cream puff. Pipe the filling onto the bottom half in a swirling motion, making it slightly taller than the pastry shell. Gently place the tops back on and finish with a light dusting of powdered sugar.Cream puffs are best enjoyed as soon as possible. For the best texture, I recommend filling and serving them on the same day the pastry shells are made. Enjoy!
Video

Notes
Nutrition
Nutritional information are estimates only as they are automatically calculated by a third party application. Actual values may differ based on brands and types of products used.