Best Coffee Sponge Cake – Light as a Cloud!
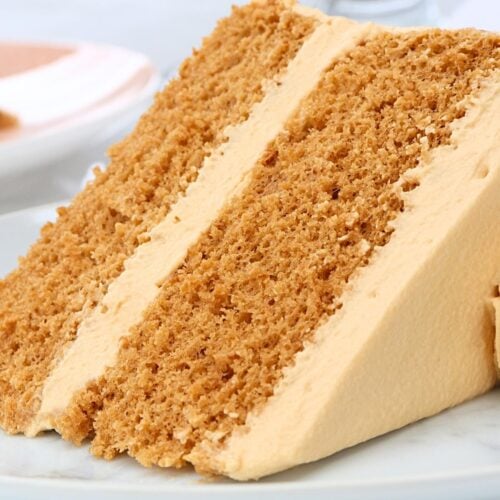
Print Pin VideoThis better-than-bakery coffee sponge cake recipe is incredibly light, airy, and is packed with coffee flavor! It consists of a super light and soft coffee sponge cake, topped with a creamy coffee whipped cream frosting. It's like biting into a coffee cloud!
IMPORTANT: For accuracy, I would recommend using the gram measurements provided, as those are the exact quantities I use. Cup measurements are given as estimates (based on US cup measurements) to make it easier for those who do not have a scale.
Ingredients
Sponge Cake
- ⅓ cup (40 g) flour - regular, all purpose (see note 1)
- ½ cup (60 g) cornstarch
- ¼ tsp baking powder
- ¼ tsp salt
- 2 tbsp instant coffee powder
- 4 large eggs - whites and yolks separated, room temperature
- ⅛ tsp white vinegar
- ⅔ cup (132 g) white granulated sugar - separated in half (1/3 cup (66g) for the egg whites & 1/3 cup (66g) for the egg yolk mixture)
- 1½ tbsp warm water - not boiling
- 2 tsp vanilla essence/extract
- 2 tbsp (30 g) unflavoured vegetable oil - I use canola oil
Coffee Whipped Cream
- ½ cup (55 g) powdered sugar - also known as icing/confectioners sugar
- 1 cup (225 g) mascarpone - cold
- 1 tsp vanilla extract/essence
- 1 tbsp instant coffee powder
- 1½ cups (335 g) heavy whipping cream - cold
Instructions
Coffee Sponge Cake
- Preheat oven to 180 °C (350°F) conventional (see note 2 if using a convection oven with a fan) and line the bottom of two 8x3 inch cake tins with parchment paper without greasing the bottom. Leave the sides of the cake tins ungreased and bare (do not line with parchment paper).
- In a bowl combine flour, cornstarch, baking powder, salt and instant coffee powder. Mix until well combined (you do not need to sift it yet). Set aside.
- In a medium sized bowl add in egg whites and white vinegar, and using a hand or stand mixer, whip on a medium high speed for 30 seconds until foamy. Gradually add in 1/3 cup (66g) of white sugar and then continue mixing for a few more minutes. Once you're almost at the stiff peak stage, turn your mixer down to low and mix for a further minute. You should end up with stiff peaks (see note 3). Set aside.
- In a large bowl add in your remaining 1/3 cup (66g) of white sugar and warm water. Mix so that the sugar is coated in the water. Add in the egg yolks and vanilla, and with a hand or stand mixer, whip on a medium high speed for 4 minutes, and then turn the mixer down to low and mix for a further minute (5 minutes of mixing altogether). Your mixture should now be thick and you should be able to create ribbons with it when you lift it up with a spoon.
- Stream the vegetable oil into the egg yolk mixture while mixing on a medium speed. Mix until well combined.
- Add in half of your egg whites to your egg yolk mixture, and using a spatula gently fold together until just combined.
- Then sift in your dry ingredients, and gently fold until just combined.
- Finish off by adding in the remaining egg whites and gently fold until just combined. You can use your spatula to break up any large chunks of unmixed egg whites, but try not to push out too many of the air bubbles and do not overmix.
- Distribute the batter into your cake pans and then drop your pans lightly on the counter. Then run a thin knife or toothpick through the batter to remove any large air bubbles and then bake for 25 minutes. To test whether the sponges are done, gently touch the tops and it should create a little indent which slowly bounces back.
- Once the sponges are done, immediately drop them on your counter from a height of about 10cm, and then turn them upside down (while still in their baking tins) on a wire rack to completely cool (see note 4).
- Once cooled (about an hour later), run a thin knife around the edges to release the cakes from the cake tins, and then turn them out onto a wire rack.
- To make my cake layers look nice and neat, I gently rub my fingers along the top of the sponges to remove the dark crust (see video for demonstration). I find the dark crust on sponge cakes are also what contain that slight eggy after taste sometimes, which is why I prefer to remove it. Once done prepare the coffee whipped cream.
Coffee Whipped Cream
- In a large bowl, combine the powdered sugar, mascarpone, vanilla and instant coffee powder. Mix on a low speed for about 10 seconds, and then turn up the speed to a medium high and mix until well combined. If using a stand mixer use the whisk attachment.
- Add in the whipping cream and mix on a low speed for about 10 seconds (to allow everything to combine without the cream splattering), and then turn up the speed to a medium high and whip until you reach stiff peaks. Keep a careful eye on the mixture as you don't want to overwhip the cream.
Assembly
- Place one sponge cake layer onto your cake stand/serving plate. Spread out a generous amount of the coffee whipped cream with an offset spatula.
- Place the next sponge cake on top and spread out a generous amount of the coffee whipped cream on the top and sides of the cake. I like to smooth out the edges with my cake scraper and then I use my offset spatula to bring the top lip of frosting into the middle of the cake to achieve smooth edges (see video for demonstration).
- Place the remaining whipped cream into a piping bag with a 1M piping tip and and pipe swirls on the top of the cake. Slice with a serrated knife (in a gentle sawing motion) and serve.
Video
Notes
Note 1. You cannot use cake flour in this recipe as a substitute for the all purpose flour and cornstarch. You can use cake flour in replacement of the all purpose flour only (I haven't tried this myself but it should work okay if you cannot source all purpose flour).
Note 2. If baking on convection mode with the fan on, bake at 160 °C (320°F).
Note 3. If you haven't reached stiff peaks yet then keep mixing. For more information on how to whip egg whites check out my YouTube video.
Note 4. By placing the sponges upside down to cool while still in the baking tins, this will prevent them from deflating.
Note 5. Because sponges do not contain a lot of fat, they can dry out quicker than regular cakes. To keep my sponges nice and soft I brush them with simple syrup. I would 100% recommend doing this step, it really takes your cake to the next level :)
Note 6. The reason why I first whip both the egg whites and yolks on a high speed, and then on low for the last minute is to remove any large air bubbles which can cause our cakes to collapse. This just ensures you have a more stable batter.
Nutrition
Calories: 219kcal | Carbohydrates: 7g | Protein: 2g | Fat: 20g | Saturated Fat: 13g | Polyunsaturated Fat: 0.5g | Monounsaturated Fat: 3g | Cholesterol: 55mg | Sodium: 20mg | Potassium: 45mg | Sugar: 6g | Vitamin A: 739IU | Vitamin C: 0.2mg | Calcium: 49mg | Iron: 0.1mg
Nutritional information are estimates only as they are automatically calculated by a third party application. Actual values may differ based on brands and types of products used.
Tried this recipe?I love hearing from you! Tag me @cakesbymk.nz on instagram so I can see your amazing creations :)